Milky Way Photography Tips
Photography Tip #203 — Needed Gear for Milky Way Photography
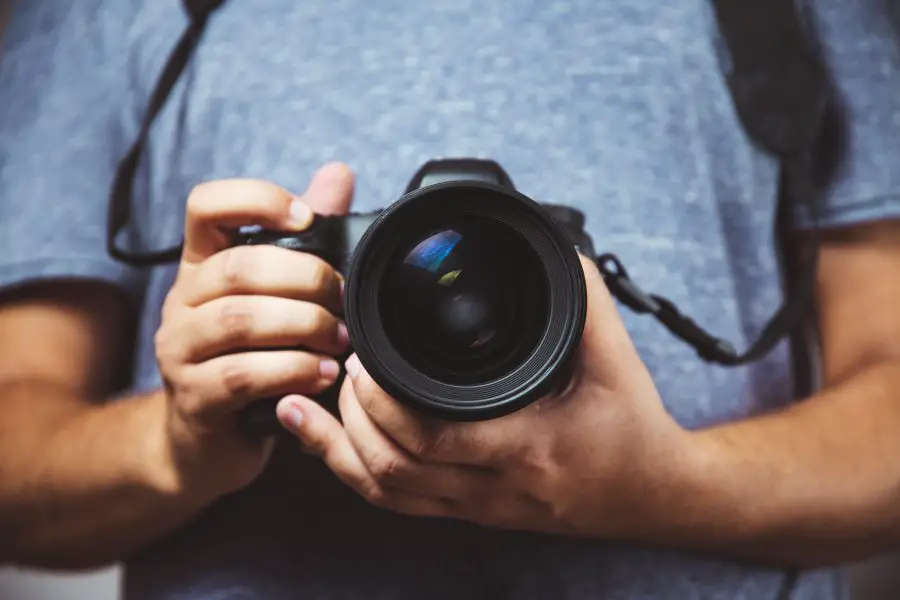
You’d need an advanced camera that gives you full manual control of ISO, aperture, and shutter speed. Manual focus is also important since you’re taking these photos at night. Plus, the camera must be good enough to produce noiseless photos at high ISOs.
You’d also need a fast lens, preferably fast-aperture, wide-angle lenses, especially if you use an interchangeable lens camera. Fast prime lenses are also great for night photography because they work great when wide open.
You must avoid slow lenses as they usually require you to increase ISO in order to improve image sharpness. The problem with that, of course, is that you end up with grainy images. This is the reason fast lenses are a must.
Next, you’d need s tripod, and something sturdy for that matter. If the tripod is wobbly, you’d end up with blurry photos. Remember that nighttime photography involves long exposures.
A sky map app like Star Walk is not a must-have but it could help by showing just where the Milky Way will be to help you plan your shoot.
Another thing you’d need for milky way photography is photo editing software which is a big part of astrophotography. Good examples are Photoshop Elements and Adobe Photoshop.
Lastly, you’d need a good ole flashlight both for finding your way and to shed some light on foreground elements that interest you (source).
Photography Tip #204 — Pack Your Bags And Move
Those who live in big cities would find it difficult to get a perfect picture of the night sky as well as the Milky Way. The main problem is due to air pollution as well as light pollution. So, if you want to get the perfect shot, you might have to get out of the city and into a more remote area.
Your eyes might not be able to see light pollution but your camera is not blind to these things. So, move out (source).
Photography Tip #205 — Focusing The Right Way
Focusing at night is challenging but you need to get it right. Here’s how to do it…
Compose your shot and set a focal length (for those working with a zoom lens). Once you’ve nailed the perfect focus manually, do not touch the zoom rings or the focus till you’re done shooting.
It might also be a good idea to completely turn off autofocus and, instead, use manual focus with Live View. Tip: Set the focus to infinity.
When using Liv View, zoom in 10% and make sure your camera is facing the brightest light in the sky, many times, this will be the moon or any a really bright star in the distance. If you can’t find any of this, then set your flashlight far away from you such that it is at infinity. Then using Live View, set your focus on said flashlight.
If your Live View mode is really good, it will brighten up the night sky and you can see the stars clearly.
Now, if in Live View mode you can see the stars clearly, then you don’t need to bother with the techniques we just explained. Just continue adjusting the focus ring till the stars look clear and sharp.
If all of these don’t work, then simply use the infinity mark on the top part of the lens. Then take some shots to see if you’ve nailed the focus or not. This one takes time but it’s your only hope now.
If you want to keep the object in your foreground in focus in addition to the stars, especially when using wide-open lenses, you can use a method known as focus stacking (source).
Photography Tip #206 — Camera Settings
Cameras do not pick up the stars as easily as your eyes do. So, to get your camera up to speed, use high ISO and large apertures. Hopefully, you have a fast prime lens. If you do, then you might not have to crank up your ISO so high.
Now, the first setting you want on lock down is exposure length. Now, if you don’t get this right, your photo would look like a large, black blanket with stars in the form of lines rather than dots. That is star trail, that is not Milky Way photography.
Now, keep in mind that though you don’t always feel it, the earth is in constant rotation. So, your exposure must be perfectly timed if you want them to look like dots (source).
Photography Tip #207 — The 500 Rule / 600 Rule
So, this rule says that determining your exposure’s optical length, you divide either 500 or 600 by your focal length to give you the ideal shutter speed that’s best for your shoot. Now, naturally, dividing 600 will give you a slower shutter speed which is why most prefer to work with the 500 rule (source).
Photography Tip #208 — Shoot RAW Only
Duh… No one shoots in JPEG anymore, at least most people don’t. Especially for night sky photography and Milky Way photography, you need to be able to shoot RAW for the sake of post processing (source).
Photography Tip #209 — Shoot in Manual Mode Only
When doing night sky photography or Milky Way photography, set your camera to full manual mode. The light isn’t enough and so you can’t let your camera meter exposure on its own.
So, turn off auto ISO, set aperture to its widest (f/1.4 is good), then apply the 500 rule for your shutter speed and set your ISO. A good place to begin for ISO is 1600, then you can keep increasing if need be. Don’t bother about your white balance since you’re shooting RAW. You can fix that later in post (source).
Photography Tip #210 — Include Foreground Elements
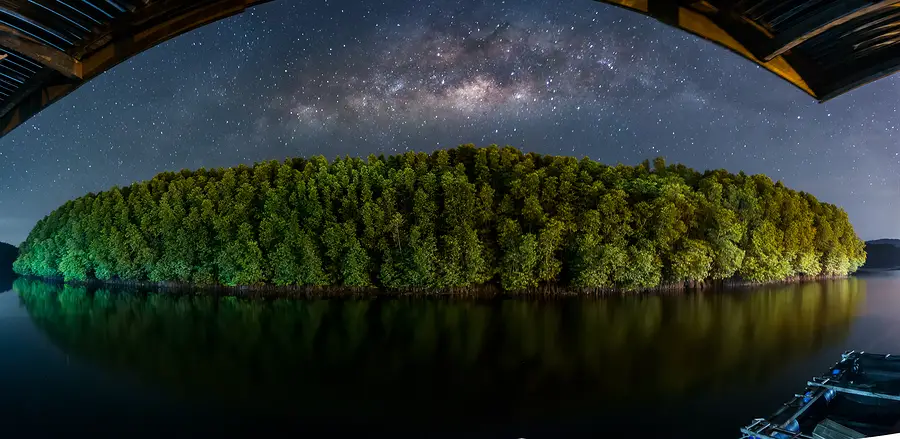
Shooting the Milky Way alone can get a little boring. So, you might want to include some foreground elements in your photo as well to make your shot more captivating. Could be a lake, a rock, a mountain, or any other intriguing element. You might need some research before you go to shoot to find locations with interesting scenery (source).
Moon Photography Tips
Photography Tip #211 — Learn The Moon’s Different Phases
The moon doesn’t have its own light, everyone knows that, right? We also all know that the moon rotates round the earth as it orbits around the sun.
Now, keep in mind that the earth rotates in a counterclockwise motion. So, when the sun casts a shadow on the moon, it tends to move towards the left.
From no moon to full moon, the illuminated side enters in from the right moving to the right. This process is referred to as waxing.
Now, from full moon to no moon, the shadows begin to appear from the right side to the left. As this happens, the moon “shrinks” which is referred to as waning.
So, to tell the condition of the moon tomorrow, check it out today and see where it’s lit at – left or right. If left, it is waning, if right, it is waxing.
Another good way to tell is the sky. Moon before sundown is waxing, moon before sunup is waning.
But if you’re more of the gadgety person, there’s an app for everything these days. You can get a moon phase app to help make the calculations (source).
Photography Tip #212 — Invest In The Right Gear
You’ll need a zoom lens to get a long enough focal lens that can capture the moon in all its beauty. You want something that’s, at least, 200mm. The longer the lens, as you know, the greater and magnification you get.
Of course, get a tripod to support that bulky lens and to be able to shoot at a slower shutter speed without ending up with blurry photos.
A remote shutter release control might also be necessary. Depressing the shutter release on the camera could lead to camera shake and blurry photos. If you can’t get that now though, your camera’s self-timer could also work (source).
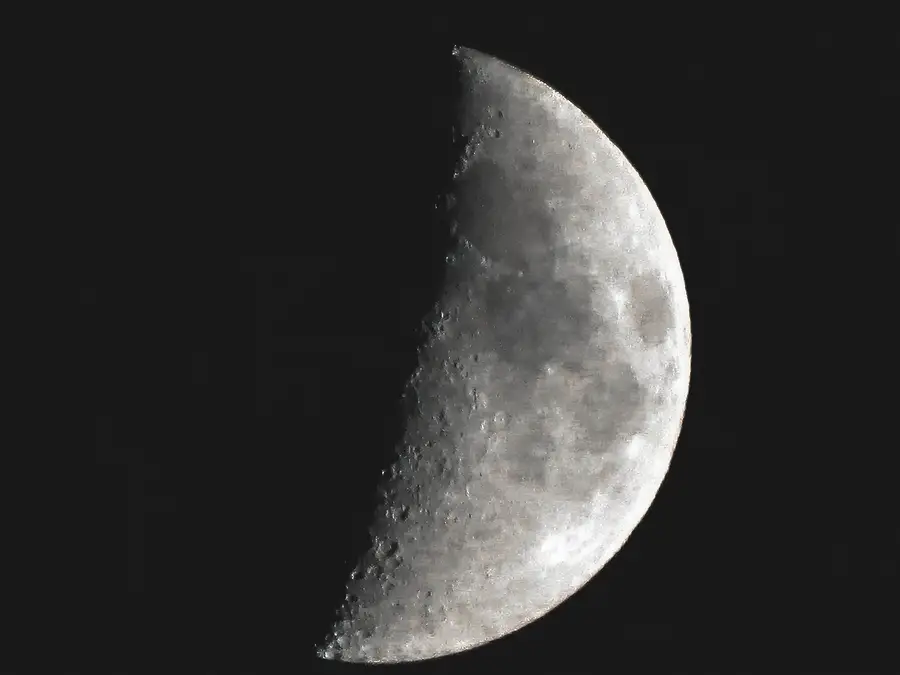
Photography Tip #213 — Use The Right Exposure
The moon does not have a plain surface. It comes with channels, craters, and other intricate details. So, if your moon looks white after taking the shot, then you overexposed which happens quite a lot because of the dark night sky which throws off your camera’s light meter.
So, fix this by turning down your exposure compensation. Or you can also use the spot metering mode for moon exposure only. Consult your camera’s manual to learn how to do that.
Now, if you want to get the best results, it’s always best to use bracketing. If your camera has auto exposure bracketing, great. If it doesn’t, then you might have to do that manually (source).
Photography Tip #214 — Select Time and Place
Cities are usually a terrible place to do night sky photography because of the light pollution. So, move towards the country.
Another thing you want to consider is that you don’t want your moon shining brilliantly against a jet-black sky. The contrast is quite harsh. Instead, aim for the blue hours where the contrast is less and the moon is still strong (source).
Photography Tip #215 — Make Your Composition Interesting
A lonesome moon can be boring. Spice things up by including other interesting things in your frame like trees or lakes. Something to give your moon some context (source).
Photography Tip #216 — Use Multiple Exposures
Now, including other objects in your frame can make things a little complicated when it comes to exposure balance between the moon and the other objects in the scene.
You can fix this by taking multiple shots at different exposures. Then take the photo with the perfectly exposed foreground and that with the perfectly exposed moon and merge them in a photo editing app.
Of course, don’t forget to blend both images using the eraser tool with the thickly feathered edge.
Now, this technique takes some practice to perfect but with time, you’d have it nailed (source).
Solar Eclipse Photography Tips

Solar eclipse photography requires the utmost care in order not to damage your eyes. Here are some tips from NASA to help you (source).
Photography Tip #217 — Your Safety Comes First
You want to make sure that you’re using a special filter called the solar filter to protect your camera. You’ll also need to be wearing eclipse glasses as well to protect your own eyes. Once, the sun is completely blocked by the moon, though, you can take off the solar filter in order to see the corona (the outer atmosphere of the sun).
Other equipment you want to have on hand during an eclipse include a tripod for reducing camera shake. You’ll also need a delayed shutter release timer. With this, you don’t have to touch the camera when taking the shot which could also cause camera shake.
Photography Tip #218 — Your Camera Will Work Just Fine, Don’t Give In To GAS
A photo is as good as the skills of its photographer. So, be less about your camera and more about what kind of image you want to create. Normally, zoom lenses are best for such shots, but if you it’s wide-angle lenses you’ve got, then landscape shots are not bad. You can capture how the environment changes during the eclipse.
Photography Tip #219 — You Can Do More Than The Sun
Although the sun might command the most attention, there are other things you can also capture. You can take a photo of when the moon takes its position in front of the moon, the long shadows and the small eclipse replicas on the ground formed from light filtering through overlapping leaves on trees.
Photography Tip #220 — Test Your Camera Before The Day Of The Eclipse
Check your exposure settings beforehand and be sure you know how to focus manually.
Another thing to set is aperture and shutter speed. Use a fixed aperture, something between f/8 and f/16 and then try different shutter speeds between 1/1000th of a second and 1/4th of a second to nail the ideal shutter speed for the partial stages of the solar eclipse.
When the sun is totally eclipsed, the corona is usually very bright. So, best settings are a fixed aperture with exposure ranging from 1/1000th of a second to 1 second.
People Photography

Photography Tip #221 — Be Unobtrusive
Being unobtrusive helps you achieve candid shots that don’t make it look like the people being shot were aware of the camera. Here are different ways to go about it.
First, know what it is you want to shoot and stay in a place that gives you the best view. Don’t shoot immediately, instead, watch to see how the elements come together and take your shot when you get what’s best for your vision.
If you’re using a long lens, you can stand far enough to be unnoticeable for a while. But if you do get noticed, don’t be unfriendly, just smile and wave.
You can also do this by staying long enough in the place until no one is focusing on you anymore. When people get engrossed in their conversations or a paper, fire away. But don’t keep firing else you become a nuisance.
Or you can set your camera with the wide-angle lens on the table, pointed towards your subject and use a remote shutter release when you’re ready (source).
Photography Tip #222 — Observe People And Predict Behavior
You should learn enough about your subject(s) such that you can predict their behavior and shoot. Waiting until you see the action is a late move and you’d miss out on priceless moments.
So, set all the settings beforehand – shutter speed, and aperture. This way, you won’t be fiddling with your camera when you’re supposed to be shooting (source).
Photography Tip #223 — If In Doubt, Research Or Ask Questions
If you’ll be going into an unfamiliar territory, do some research and ask questions before you go. They might have some taboos about photography. You never can tell. Learning the local language, short, simple phrases, at least, can help improve communication with the locales and make them more open to you (source).
Photography Tip #224 — Take Environmental Portraits Too
These are photos that show people and what they do with their surroundings which could be their home or their place of work. So, you can take photos of people redecorating their homes, or someone doing something at their workplace like a farm or an art studio (source).
Photography Tip #225 — Even Group Portraits Should Tell A Story
It might be more challenging to capture a telling moment with group portraits. You’d need to patiently and creatively get the group to engage with their environment in a way that expresses the core of who they are. You can also get some ideas from the group on things they can do to creatively express their core and create a more engaging photo (source).
Photography Tip #226 — Photograph Other Body Parts Like The Hands, Feet, Fingers, Etc.
Other parts of the body besides the face can also make for interesting subjects. The hands of a farmer, feet of a ballerina, hair on a pillow, etc. Basically, look out for parts of the body that tell a story about these details of the body are important to the subject and what they do or how they feel (source).
Wedding Photography Tips

Photography Tip #227 — Plan Ahead
Create your shot list beforehand so you don’t miss out on any important shot.
Also, make sure your batteries are charged, your memory cards are ready, your drive is planned and scheduled, etc. (source).
Photography Tip #228 — Appoint Photo Coordinators
They will help you round up the needed members of the family for each shot. Remember that people are in a festive mood, they are catching up and basically having a good time. If you have a coordinator from each family, they can help fetch the needed people for each shot when you need them (source).
Photography Tip #229 — Talk With The Couple
Get to know their expectations and let them see your portfolio and style. Find out the most important moments they want recorded and, of course, settle on pricing (source).
Photography Tip #230 — Turn Off Camera Sound
Camera beeps are distracting and quite the nuisance. Turn them off (source).
Photography Tip #231 — Don’t Forget The Small Details
Rings, the back of the wedding dress, table setting, menu, shoes and bouquet, these are other interesting details that add some more dimension to your album. You can flip through wedding ‘zines for some inspiration (source).
Photography Tip #232 — Get An Extra Camera
Get an extra camera with a different lens. So, now you have two cameras. You can fit one with a wide angle lens for taking your candid shots or taking photos in tight spaces. Most times, these shots are taken during the preparation for the wedding.
So, how long a lens are we looking at for the other camera? Well, you can get as large as 200mm. this one will come in handy for taking candid photos without necessarily being obtrusive (source).
Photography Tip #233 — Get Help
With a backup photographer, you can divide the work and achieve more with less movement and stress. So, one person takes the formal shots, the other takes the candid ones (source).
Photography Tip #234 — Don’t Be Obtrusive, But Be Bold
Timing is important, so ensure you observe and anticipate moments so you can get into position on time without disrupting anything. If you ready your camera at the time of the camera, then you’re late and will, likely, miss out on the moment.
During the formal shots, get bolder. You are the director, so guide your subjects to provide the action that would make for the best shot (source).
Photography Tip #235 — Use Diffused Light
Lighting isn’t really great in most churches. So, if you’re allowed to use flash in the church, then you must learn how to bounce light correctly.
When bouncing off light from the flash, you should use a colored surface. This adds a colored cast to your photo.
Another equally great idea is to simply use a flash diffuser. This diffuses the light, thereby softening it and makes the flash less harsh in the photo.
If you can’t use a flash – there are churches that don’t permit that – then consider bumping up ISO or using a wider aperture (source).
Photography Tip #236 — Shoot In RAW
Of course, shoot in RAW. You’re going to be doing a lot of post-processing work especially with white balance and all thanks to the tricky lighting you find in most wedding scenes (source).
Photography Tip #237 — Pick A Great, Decluttered Background
Especially for the formal photos which you have some control over, look out for uncluttered shaded areas as background for your photos. You know, places where people are less likely to just waltz in (source).
Photography Tip #238 — Check The Images After The Event
Resist the temptation to check your images right there and then. You might delete some images that don’t seem to work at that time but could actually be really interesting if you looked at them with a fresh eye or with some post work (source).
Photography Tip #239 — Try Getting Everyone In One Shot
This is a really good tip. Get someone to gather everyone together and climb up to the highest point possible. Doing this means you can fit everyone in that one shot and you get the faces of everyone (source).
Photography Tip #240 — Use Flash If It’s An Outdoor Wedding Or You’re Shooting Outdoors
This one is an outdoor wedding photography tip. If the ceremony is an outdoor one or you’re taking some outside shots, you’d need to use the fill flash technique. Especially if the background is really backlit or it’s in the middle of the day, you can count on some really strong shadows ruining the photos, so you’d need fill flash to correct that (source).
Photography Tip #241 — Continuous Shooting Mode
This one is commonsensical, right? You get more picture-perfect moments that way (source).
Travel Photography Tips
Photography Tip #242 — Wake Early, Sleep Late
If you wake early enough, you’d have fewer tourists to deal with, as well as fewer photographers. Arriving early at those tourist sites will help you get amazing photos of those sites. Don’t forget the golden and blue hours as well.
Some experts say that shooting at midday when the sun is brightest is the worst thing you can do in travel photography. You might want to keep that in mind (source).
Photography Tip #243 — Scout For Your Location Beforehand
Of course, it just makes sense to plan ahead and know where you’re going, right? You can begin your research with Google Image Search and Instagram.
But that’s not all, you also want to check out the tourist attractions and when they open. Find out about weather, vantage points and when tourist traffic is most likely to be low.
Then, create your shot list before you go as well.
Don’t forget to pick simple phrases in the language so you can politely engage people and ask their permission to take their photo (source).
Photography Tip #244 — Make Out Time For Your Photography
Especially if you are on an organized tour, it might make more sense to wake earlier in order to get those shots. If you don’t, it could be difficult to explain the group why you need to stay around an extra 30 minutes to take photos when the sky is better.
Another good option might be to travel alone or travel with other photographers. This way, it’s way easier to create ideal times to do your shoot (source).
Photography Tip #245 — Protect Your Gear Against Theft
Your gear can get stolen and, trust us, it happens a lot more than you think. So, to be safe, get insurance to minimize loss. If your rental or homeowner insurance doesn’t always cover you, then you can get insurance from the Professional Photographers of America.
When you aren’t shooting, ensure it’s kept in a safe or a locker. When out, especially in suspicious areas, keep your camera in a non-descript bag till you’re ready to use it.
Also, ensure you register your gear with manufacturers, copy the serial numbers, and keep the receipts when you need to make your insurance claims, if you have to (source).
Photography Tip #246 — Wander Around More
After ticking off all the locations you included on your shots list, it’s now time to wander off through the unbeaten paths. Who knows what you might find? Now, be careful though, wandering to get photos is nice but stay safe, still. Make sure you talk with locales to be sure you’re not going somewhere dangerous.
Another thing about wandering off is that you get to truly see the people of the destination in their natural habitat. Most times, locales tend to avoid tourist-populated areas. So, a little exploration might get you more honest photos (source).