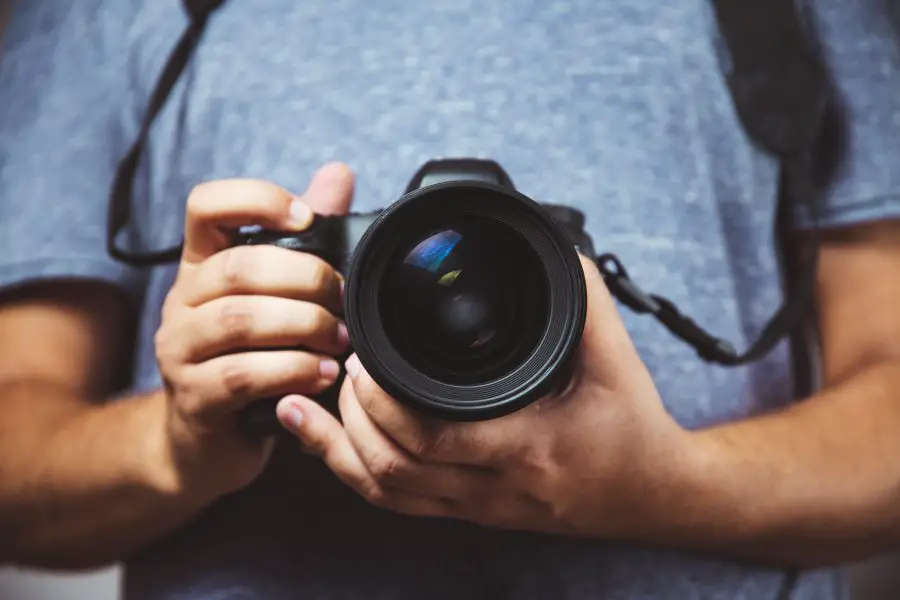
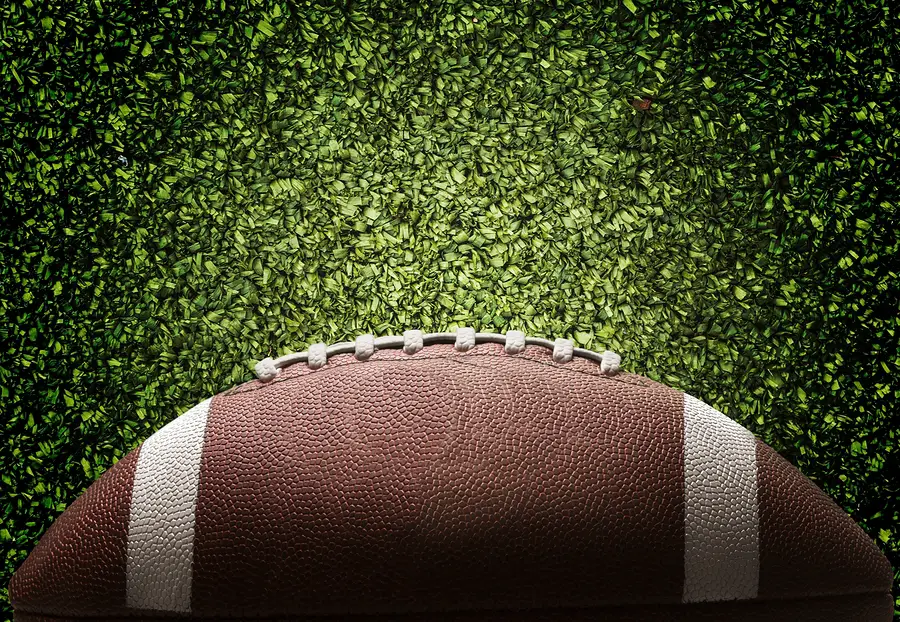
Sports Photography
Photography Tip #152 — Use A lens Of, At Least, 200mm
Using a focal length of 200mm will help you get in on the action without having to zoom in. this way, you don’t isolate any of your subjects (source).
Photography Tip #153 — Do Not Shoot In Full Auto Mode
Don’t fall for the trick of setting your camera to “action” or “sports” and then expect your camera to do all the work. If you really want to do some professional level shots, then set your camera to semi-annual mode (source).
Photography Tip #154 — Use Faster Shutter Speeds
If you want to get in all the quick action in the world of sports, then you need a shutter speed of, at least, 1/500th of a second to freeze motion. Whatever you do, don’t go below 1/500th of a second (source).
Photography Tip #155 — Shoot In Aperture Priority Mode
Setting the camera in aperture priority mode means the camera determines the shutter speed. It’s the best mode to shoot in on a sunny day and for sports photography too. At least that’s what most experts use.
So, look at setting a pretty wide aperture – f/2.8 or f/4 so that the sensor gets enough light. When this happens, your camera selects a fast shutter speed to give the image the right level of exposure and to freeze the action as well (source).
Photography Tip #156 — The Right ISO To Use Should Depend On The Light And Weather
In shooting in aperture priority, you’d need to set the ISO yourself considering the light and weather conditions of your location. So, if it’s bright and sunny, for instance, you don’t have to raise the ISO so high, ISO 400 is usually great since there’s plenty of light to work with.
On the other hand, if the day is dull and overcast, then maybe you could bump up the ISO to, up to 1200 stops (source).
Photography Tip #157 — If Aperture Priority Mode Is Not Available, Use Shutter Priority Mode
If your camera is non-SLR, it does not have aperture priority mode. This means that you can’t use aperture priority mode. But this doesn’t mean you can’t land good shots anyway. Shutter priority mode can still help you get great photos.
With shutter priority, you get to decide how fast or otherwise the shutter gets and then the camera determines the width of the aperture. Like we explained earlier, use a shutter speed of 1/500th of a second, at least.
Now, while selecting the shutter speed you’d end up with, you want to take test shots. These shots are to help you find out if you’ve set the shutter speed too high such that enough light doesn’t get into the sensor (source).
Photography Tip #158 — Shoot In Burst Mode With Fast Autofocus
If your camera is going to keep up with the fast action on the field, then your focus shouldn’t be locked to one spot. It should be able to move continuously focus on your subject (s) as they move around.
Shooting in burst mode also helps as you get several images at a time and a higher chance of getting the winning shot. Don’t forget to set the burst mode to the maximum number of frames per second (source).
Photography Tip #159 — Know The Sport You’re Photographing And Position Yourself Rightly
You should be standing with your back to the sun so all the light falls on the field and your subjects.
Also, knowing the sport you’re covering in and out, helps. This way, you can anticipate where the next action might be. This could help you take better shots.
When following the action, ensure that the camera is zoomed in closely such that the most part of the frame is contained by the players (source).
Photography Tip #160 — Take Many Photos
This rule is as simple as it comes. Make sure that, at the end of the event, you have enough photos (source).
Photography Tip #161 — Low Angles Are Best
The best angle to shoot from is from your knees. This way, your shot is more dramatic and you have a clearer background which is better than seeing grass and other athletes. This lower perspective adds an excellent depth of field to your photos and all the pros use it.
If you can, it might even be a good idea to get a monopod, even if you think your camera and lens are not so heavy. A monopod will help you steady your camera while you take your photos from such low angles, especially when you’re on your knees (source).
Photography Tip #162 — Be Attentive
This one is in the interest of your safety. If you don’t want to get hit, it’s better you’re fully aware of your surroundings (source).
Photography Tip #163 — Avoid Using The On-Camera Flash
Using the built-in flash or one that’s even attached to the hot shoe is not only ineffective, it is distracting to both the spectators and the athletes. So, avoid using it (source).
Photography Tip #164 — Use A Wide-Angle Lens
Most sport photographers use telephoto lenses but these are not the only lenses usable in sport photography. With a wide-angle lens, you can make your images look more engaging such that your viewer looks like they are in the field of play (source).
Photography Tip #165 — Focus, Face, Action, Equipment
Consider this a recipe for the perfect sport photo. Reviewing each, we have:
Focus – sharp images not blurry ones.
Face – your photo should show facial expressions with special focus on the eyes.
Action – your photo should tell a story by containing some action, either emotional or athletic.
Equipment – the athlete should be holding a sport equipment, preferably the ball (if applicable) (source).
Photography Tip #166 — Your Photos Should Tell Stories – Sportrait and Story Photos

In sport photography, there’s such a thing as “sportraits.” This is, usually, a photo of one athlete during the sport. There are also photos referred to as stories. These ones usually have more than one athlete in the photo usually doing something significant.
To take such photos, you want to seek out emotionally-charged moments like a celebration, sadness, or two runners approaching the finish line neck-to-neck (source).
Photography Tip #167 — Get A Fast Zoom Lens
We already mentioned that you’d need to get a wide-angle lens. But another lens you’d need is a zoom lens too – a fast one too. There are a number of reasons you’d need a fast zoom lens. One is that your distance to the action will vary throughout the event. Also, you can’t always trust that the lighting in the sports hall will be great.
With a fast zoom lens, you get to shoot even in low light, and you can still work with a decent shutter speed.
One recommendation pros give is the 70-200mm f/2.8. It’s a light lens and , compared to others, it is relatively inexpensive (source).
Photography Tip #168 — Action Can Be Off The Field Too
Yes, most of the action is on the field, it’s a sporting event, after all. But you should also look out for interesting happenings off field too. You’d definitely find interesting subjects that can complement the rest of the on-field photos. This is a great way to get your viewer feeling immersed (source).
Photography Tip #169 — Use Your Rear AF-On Button
When shooting sports photography or action, it’s better to get your focus by using the AF-On button on the back of your camera. If your camera lacks this, you can always program the AE-L/AF-L button as another option.
This is a much better option for following the action on the field of play (source).
Photography Tip #170 — Look Out For Clean Backgrounds
Generally, with a shallow depth of field, you’ll always be to isolate your subject. Nonetheless, you should still make an effort to shoot with clean backgrounds and avoid the distracting ones to give your image much better impact (source).
Photography Tip #171 — Use Panning To Introduce Motion
Panning takes some practice, but once you get the basics nailed, it’s pretty simple and the results are amazing (source).
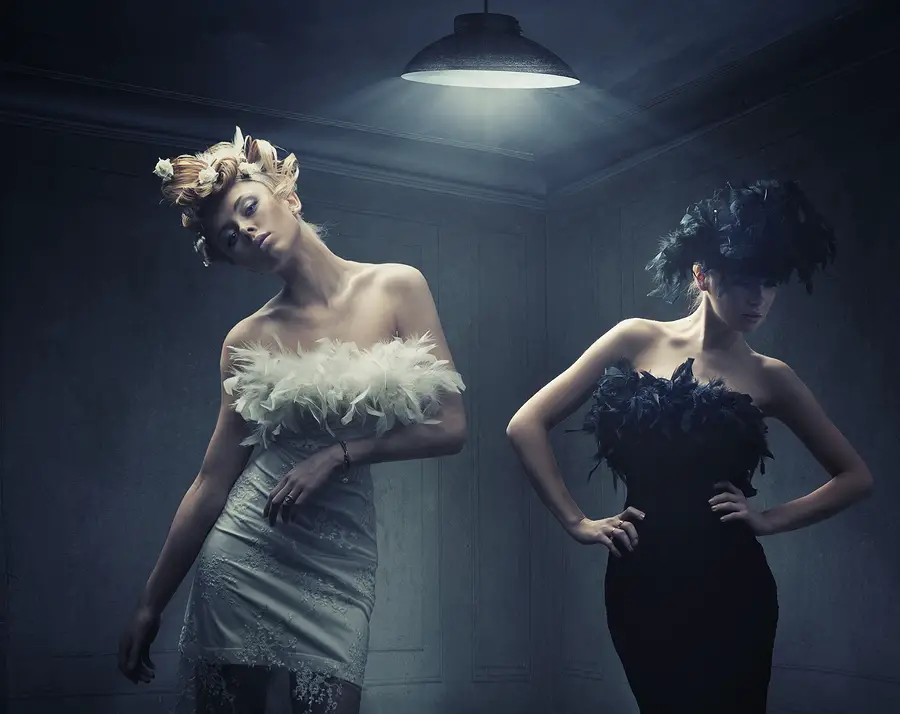
Fashion Photography Tips
Photography Tip #172 — Come Prepared And Exude Confidence
If you’re confident in how you direct your model, it reflects in their performance. Also, it might help to come along with a list of all the shots you plan to take as a sort of compass.
You should have all the clothes, props, as well as the location prepared beforehand as well. And then make sure you communicate the agenda and posing directions to your model coherently (source).
Photography Tip #173 — It’s All About Beauty
You want to ensure that your fashion shoots reflect beauty and more. So, if the shoot is for the clothes, the hair and makeup should complement the clothes. And if it’s the hair and makeup that’s the focus, the garment should complement the style.
A more seductive or provocative look is enhanced by heavy makeup and heavily-styled hair. To portray innocence, on the other hand, you might want to go for subtler makeup, soft and flowing hair, with pastel tones.
Also, if the shoot is for commercial purposes, you might want to lean more towards small chins, full lips, symmetrical faces and big, almond eyes. If the aim, on the other hand, is to bring some personality to the piece, unusual-looking models are best (source).
Photography Tip #174 — Browse Through Fashions Mags For Some Posing Inspiration
It can be a bit tricky coming up with posing styles for your shoot. To help, you can check through your favorite fashion mags for some inspiration, as well as to be sure of posing styles that are currently in vogue.
One tip – angular poses make photos look edgier and more interesting as they elongate the length of the model’s body (source).
Photography Tip #175 — Shooting In A Studio Is Ideal
Ideally, fashion photography should be done in a studio as you’re better able to stabilize conditions and control your lighting.
Now, if you’re shooting in a studio, ensure that all areas of your scene are properly metered else you’d have to deal with unwanted shadows. Again, do not use the light meter in your camera, rather, use a separate one for a more precise reading (source).
Photography Tip #176 — Use A Mirror As Props
Mirrors form excellent props in fashion photography as they allow the photographer effectively display both the front and the back of the model at the same time.
Now, don’t forget to take spate reading for your mirror. Also, you might need to consider bracketing your exposures as well.
Very importantly, you want to make sure you position yourself such that neither you, nor your light, nor other equipment appear in the reflection while you shoot (source).
Photography Tip #177 — Location Matters
Location matters because it’s part and parcel of the narrative you’re creating. So, for edgy styles, you might want to consider an urban location. For natural styles or summer/spring styles, rural environments might be best (source).
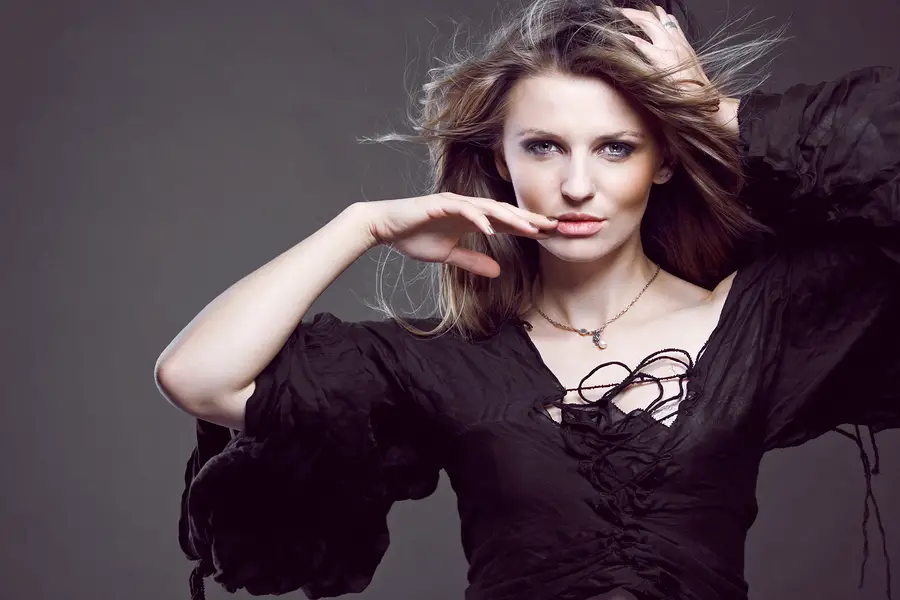
Model Posing Photography Tips
Photography Tip #178 — Break The Ice With Your Model To Prevent Awkward Poses
A comfortable model is more likely to give you interesting poses than one that feels awkward around you. If you’re not yet familiar with the model, then begin with chitchat before you go on to shot (source).
Photography Tip #179 — Start Simply
Always give warmup time, especially if the talent is inexperienced. Don’t head straight on into the complex poses. Begin with the natural, simple portrait poses first, and then, as they relax and get more confident, bring out the big guns (source).
Photography Tip #180 — Take Candid Shots
Acting natural in front of a camera is weird. So, keep your camera on even during breaks. As they walk, sit, or stand, you might get some really nice shots that are even better than the staged ones. Be aware though that this does not work for editorials as such poses require a high level of skill (source).
Photography Tip #181 — Let Your Model Play A Role
Giving your model a role to play might be a much easier to get the result you want from the talent than simply giving directions. Being character better helps them picture what you have in mind. Also, while they do this, have them move around for a more natural feel.
Photography Tip #182 — Posing For A Natural Look – Be Attentive To The Standing Posture
The model’s body form is crucial when it comes to poses, so pay attention to you model’s standing posture. If they are going to exude confidence, they are going to have to stand straight. Crouching will make them look awkward regardless of how their limbs are positioned.
Angling the body in the direction of the camera is another great idea. It makes the model look more sophisticated and also gives their body some dimension. However, if they look too stiff in that position, you can tell them to lean on the foot behind to make them look more relaxed (source).
Photography Tip #183 — Angled Limbs Make Your Model Look More Natural
The limbs can be quite confusing in a pose. Oftentimes, people don’t know what to do with their limbs, especially young models. If you encounter such, simply ask them to flex their limbs a little – they don’t have to go all the way.
If it’s a full body pose, you can have the model bending one knee slightly while they stand and then put their arms at their waist or hips. If the model has their hands in the air, then have one elbow arch just a little bit.
The reason these angles are important is that, triangles are attractive to humans, and, yes, this is a science. Plus, triangles bring balance to a pose so the model does not look too rigid (source).
Photography Tip #184 — The ¾ Pose

This is a term that’s thrown around a lot in fashion photography. In this pose, the model is positioned at an angle about 45% away from the camera, this way only ¾ of the model’s body remains visible.
Why this pose is so appealing is that it adds some dimension and depth to your subject. So, if it looks like your subject is looking a bit flat in the photo, you can try this technique. It works for both full body and half body photos (source).
Photography Tip #185 — Clenched Fists Are Aggressive, Avoid Them
Let the model curl their fingers rather than fold them. And by curling, they don’t have to purposely crimp it. They can just keep their hands open, naturally.
Another thing they can do with their fingers is to stick their thumbs in their pocket, to make them look elegant (source).
Photography Tip #186 — Chin Up!
For face poses, the chin plays a very important role. So that all the curves of the talent’s neck and face are emphasized, tell them to chin up. Of course, chinning up does not mean that the model has to stick their necks out like turtles. They just have to raise it up a little bit (source).
Photography Tip #187 — Where The Eyes Should Look
Staring into the camera might produce awkward images, sometimes. In such cases, have your model look at something specific behind you. This way, their eyes don’t look blank.
For a more contemplative look, let the eyes focus on something far away. And for a more intimate look, the point of interest should be closer.
Don’t forget that the whites of the eyeballs showing too much makes for weird photos. So, the model shouldn’t stare out of the corner of their eyes. Instead, the eyes should go where the nose points so you see more of the irises (source).
Photography Tip #188 — Have The Model Move Around For A Dynamic Photo
Not all your photos have to be static, having your model move can also make your photos look more dynamic. Jumping is one of the most exciting movements to try, although this one takes a few tries to nail. Also, don’t forget to tell them to keep a calm face while jumping.
If jumping is too energetic, you can also have your model walk, dance, flip their hair, cross the street, spin around poles or make other natural movements (source).
Baby Photography Tips

Photography Tip #189 — Consult With The Parents First
You want to know what the parents’ wishes are before the day of the shoot. How do they plan to use their portraits – display at home or birth announcements? Do they want a picture collage or just one memorable photo? Are they looking to go casual or are they looking to go formal?
You need all these questions answered to know what to do with the shoot.
Knowing the baby’s gender and age would also help you determine what props and backdrops to use.
Also ask the parents if other people are going to be in the shot like themselves or the baby’s older siblings.
Lastly, be mentally prepared if the baby in question are actually “babies.” That is, if they are twins or triplets, then you’d naturally have more work than if it was just one child (source).
Photography Tip #190 — Be Safety-Conscious
Babies are very delicate beings. If you’re not careful with your space, they could end catching a cold or an illness. Ensure the poses you put the baby aren’t risky. You know babies don’t have control of their bodies yet. Plus, ensure you don’t cover them with anything that could cut off air supply.
Of course, make plans for breaks and make sure the baby is fed and changed just before the shoot (source).
Photography Tip #191 — Choose The Right Style
There are two styles you can choose from when it comes to baby photography. You can either go for a posed photography or a lifestyle photography.
Usually, the posed style is used for newborns still within two weeks of birth. Beware, this is a little demanding since babies can’t exactly be coached on posing skills.
Infants, on the other hand, typically use the lifestyle style. This is more fun because it’s laidback and spontaneous. Some parents would love quirky photos of their kids and might not even mind if their kids are crying. If you land such parents, lucky are you. You’d have more fun with your session (source).
Having a variety of backdrop color options for parents to pick from is a great idea. From blue to pink, to more neutral colors like yellow, cream, or green. Don’t forget to also get something to cover the floor. There are special photography rugs for newborn photography which you can use.
Don’t forget props like baskets, blankets, stuffed animals, headbands. And if the parents have some that they want to use, please respect their wishes.
And it doesn’t always have to be bought, DIY props like chalkboards displaying name, age, and birthday could work as well (source).
Photography Tip #192 — Use Proper Lighting – No Flash
For babies, it is highly important that the lighting is right because babies are easily startled. Never use the flash. If you do and the baby wakes up and begins to cry, it’s could ruin the entire shoot. So, best practice is to go for natural. You might want to shoot close to a large window (source).
Photography Tip #193 — The Baby Should Be The Focus Of The Photo
This much is obvious and one way to make it happen is to set your aperture to between f/2 and f/2.2. With this, your camera gets more light, depth of field is shallower, and the background elements are blurred. All the while, the baby is kept in focus.
Another way to do this is to use a macro lens. Just note that this is best used when the baby is sleeping because for the lens requires the subject to be perfectly still for proper focusing. If the baby is not already asleep at this point, get the parents to soothe the baby so they can sleep and you can shoot with a macro lens (source).
Photography Tip #194 — Try Different Baby Poses

A classic one is the frog pose. In this position, the legs are to the side and the baby’s hands are under the chin in a cupped style. This pose allows you to really bring out their angelic facial features.
Or you could try the taco pose where the baby is wrapped in a blanket around the lower body with just the feet peeking out.
You can also lay the baby to the side and have their hands under their chin. Have the baby snuggle into a blankie and throw in a hat for the perfect finish (source).
Photography Tip #195 — Newborn Photographs Are Best Shot Within Two Weeks Of Birth
After two weeks, babies no longer look new. So, if you want those cute, sleepy newborn shots, your best shot is within two weeks of birth. Shooting after two weeks isn’t bad, it’s just that babies get more active after two weeks and getting the perfect sleeping shot becomes more difficult (source).
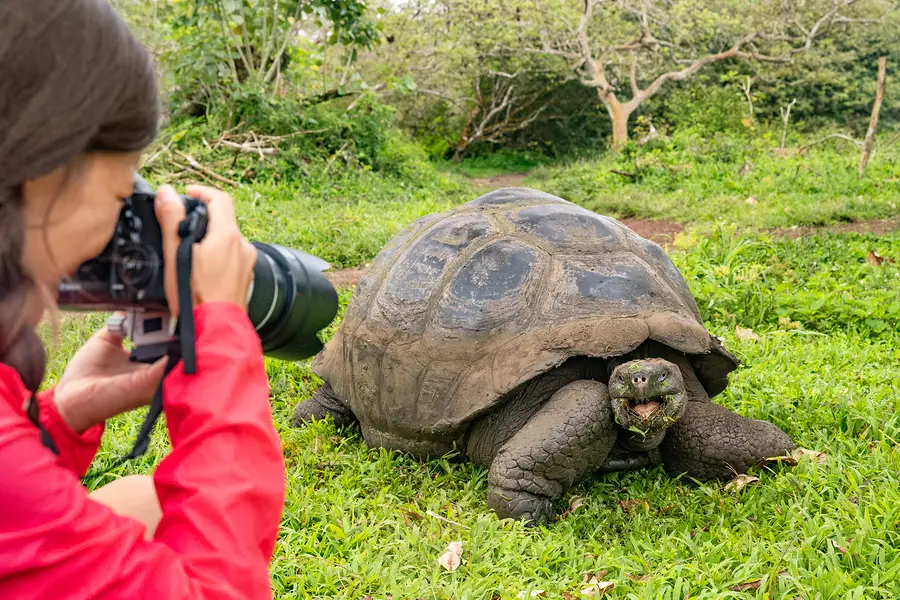
Animal Photography / Pet Photography

Animal/pet photography is pretty much the same as baby photography and portrait photography. But here are a few other tips to add to the ones you’d find in the baby photography tips.
Photography Tip #196 — Capturing The Animal In Motion
Of course you’d have to freeze the motion if your photo is going to come out with any blurriness. So, turn your camera to shutter priority mode. This gives you control on how you freeze your action. Also, make sure the focus mode is continuous focus not auto. This way the lens is always on the pet as they run or play.
Again, take multiple shots with continuous shooting mode. It improves your chances of getting the perfect shot (source).
Photography Tip #197 — Recommended Settings For Pet Photography
For pets in motion, shutter speed can get as high as 1/3200th of a second. For relaxing pets, no flash. Widen the aperture instead so that more light gets in. Besides, it keeps the pet in focus and blurs out the background (source).
Photography Tip #198 — Recommended Lenses For Pet Photography
There are two kinds of lenses you can get when doing animal or pet photography. You can get the telephoto lens which is great for taking far away shots of the pet. Just make sure it comes with image stabilization (source).
You could also go for the standard lenses too. An example is a 500mm f/1.8. You could also go for an f/2.8. This lens is great for portraits and also work great and fast when light conditions are bad, even without a flash (source).
Wildlife Photography Tips
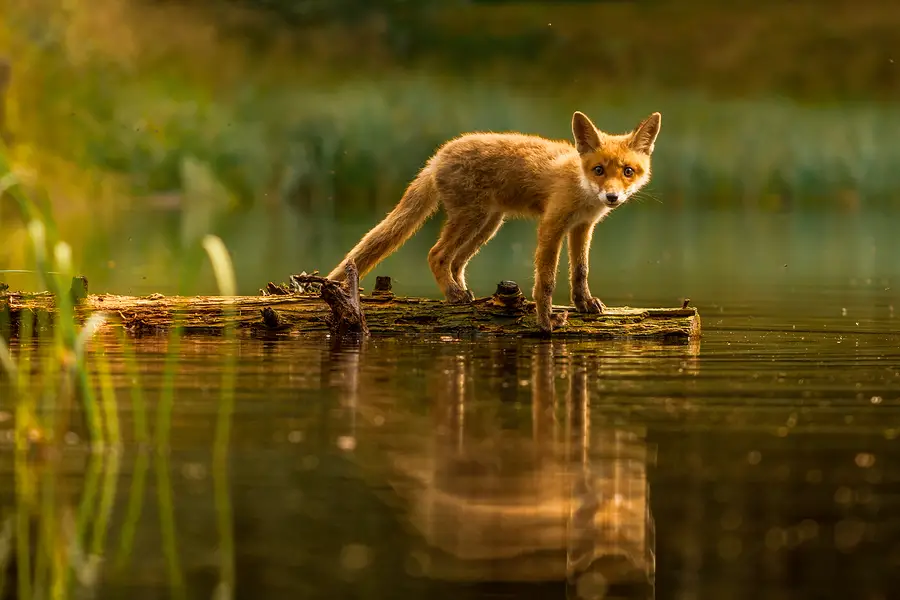
Here are national geographic tips for taking pictures in the wild (source).
Photography Tip #199 — Getting Your Gear Together
Wildlife photography needs a lot of gear – heavy ones for that matter. First, you’d need to invest in telephoto lenses. The length of these lenses should depend on how close you can get to the animal. But, typically, you should be looking at lenses between 300mm to 600mm.
Now, because carnivores are typically blasé, they don’t scamper around like herbivores and co. You can good shots of them with a 300mm lens and do just fine. But for shy animals and birds, you need to pull out the big guns. Now, because these are heavy, it might be more convenient to shoot out of your car with them.
If you’re walking, it might be more convenient to use the 300mm with the aid of a teleconverter. Teleconverters are smaller and lighter with magnifying abilities. Nonetheless, they tend to downgrade images. But, on the flip side, your shoulders and your back will be a lot happier.
Photography Tip #200 — It’s Also About The Animal’s Habitat
While it’s cool to use long lenses to zoom in on the animals for a nice close up shot, you must also remember that animals have their own personalities as well. So, it’s also a good idea to capture their habitat as well to show how they interact with their environment.
Photography Tip #201 — Don’t Forget The Smaller Animals Around
We know that when it comes to wildlife, all thoughts go to the big guys. And, of course, it’s only expected that you include such in your portfolio. However, it’s not just the big guys that make up wildlife, there are also smaller animals around too, some of which are really captivating.
So, while you sit in your car and wait, have a look around, what you find might just amaze you.
Photography Tip #202 — Camera Settings When Shooting Wildlife
Since longer lenses are generally more unstable, you must especially be careful of camera shake too. The slightest shake, and your photos end up blurry. To avoid that, use a fast shutter speed, as fast as you can while considering how shallow you want the depth of field to be.
Remember, the larger your aperture size, the smaller the depth of field. By the way, telephoto lenses that are really long have really little depth of field to offer you at any aperture.