Real Estate Photography Tips

Photography Tip #104 — Create A Shot List For The Properties You’d Be Shooting
Now, houses vary widely in their structure and so no two houses would require the very same shots. However, there are some shots that are considered pretty much standard once you think of real estate photography. For instance:
The kitchen, bedroom, and living room should get 2 wide-angle shots.
The bathroom gets one shot. The only exception is if the bathroom is particularly stunning or spacious.
Backyard gets between 1 and 3 photos. Again, exception should be given if there are some unique features the backyard has.
Laundry room, pantry, and garage each get one shot.
Creating this list is important as it gives you a sort of reference point to navigate with even when there are distractions. This way, you don’t miss out on the all-important shots and focus on the ephemerals.
You can also decide to share your shot list with the agent so they know what exactly they are expecting from you (source).
Photography Tip #105 — The Night Before Your Shoot Is The Time To Get Ready
You don’t want to find out on location that something or the other isn’t available or isn’t working. Even if you are good at improvising, this is still a situation best avoided. Get everything ready and tested the night before the shoot.
Don’t forget to carry along your secondary camera as well as your charger. Charge all your batteries, format your memory card, and then pack your bag. Don’t forget your backup gear too, if you can take it along.
After doing that, confirm that you have the right address and that you have scheduled good enough time to arrive there on time (source).
Photography Tip #106 — First Thing To Do At The Property – Declutter
This is a cardinal rule of real estate photography. The little belongings here and there which home owners don’t notice will stand out (not nicely) in a photo. So, the first thing to do is to declutter the property.
Surfaces like desks, coffee tables, and countertops should be cleared as much as possible. Or if you want to include some décor, leave it at 3 items, max.
Don’t bother about closets when shooting interiors. That is, except they are very spacious or customized. Other than that, the closet should hold all the clutter until after the photoshoot.
Ideally, all the decluttering should be done before you arrive so you can hit the ground running. So, get friendly with the agent and get them to inform the home owners to declutter as much as possible before you arrive.
If you get there and there’s still some decluttering to be done, don’t feel weird having to ask that few other things be taken out (source).
Photography Tip #107 — Get A Feel Of The Space By Walking Around The Home
Walking through the home you’re about to shoot is important to give you a general feel of the place before you shoot. As you walk through, you’re seeing the flattering angles, taking note of other items to be removed, and, generally, deciding how you want to do the photoshoot.
Another thing this does for you is, you know which is ready to be shot, and which still needs a few minutes to be tidied up. This way, you can also make a mental order of the photos you’d be taking (source).
Photography Tip #108 — Decide Whether You’d Work With The Lights On Or Off
When lights are on, a space is immediately gives off warmer, more welcoming feel. But then again, there’s the varying light temperatures to consider. So, be sure to make up for that in post, if you decide to go with the lights on.
If you decide to go with the lights off, the space gets a more even light temperature. Problem is, it might make the space (especially an interior space) look a little cold which you might not want.
There’s no one rule to follow when it comes to deciding whether to go with the lights on or off. We’d recommend that you let the property decide. However, whatever you decide to go with, ensure that you use stick with that throughout the entire property (source).
Photography Tip #109 — How To Use Your Flash
First of all, yes, you should use a flash when taking your real estate photos. Preferably, use a flash unit you can attach to your camera so you can move from room to room swiftly.
Now, there’s a right and wrong way to use your flash. The right way is to direct the flash to the walls, so it bounces off the wall and is softer. You can also direct the flash such that the light bounces of the side wall or off the ceiling. This way, the light diffuses into the room, giving you more even lighting.
Directing the flash straight into the space makes the light way too bright and harsh just dead center, followed by a shadow just around it. That’s bad.
Aside from that, another thing to note about using flash when doing real estate photography is to use it in manual mode. This way, you’re in total control of its strength per time.
It’s always good to start minimally and then increase if need be. But if the area you’re shooting faces a bright window, then you might just go full power at once (source).
Photography Tip #110 — To Create Less Distortion, Shoot Straight
Whatever angle you’re shooting from, you want to ensure that your camera is always straight to avid distortion. If you ever decide to tilt the camera slightly up or slightly down, you’d observe that vertical lines begin to distort into one direction or another.
For real estate photography, the ideal height you want to maintain is about 5 feet or 152.5 centimeters. Of course, there will be one or two outliers, but, generally, at 5 feet, most homes look balanced and more natural.
If you’re way too up, you see less space and more ceiling. If you’re too low, you see less actual room and more furniture (source).
Photography Tip #111 — First Thing To Correct In Post Is Distortion
So, the first thing to do in post when you’re set to edit your photos in Lightroom, is correcting your verticals. You also want to apply lens correction as well. Once these are done, your photo instantly looks more polished (source).
Photography Tip #112 — Make Basic Adjustments
What are the basic adjustments? Lower the highlights. Brighten the shadows. Deepen the blacks. Raise the clarity.
At first, it takes some time to find your own workflow and style. But don’t be afraid to keep experimenting. But with time, you find it (source).
Photography Tip #113 — Balance The Light Temperatures
In explaining whether to go with the lights on or off, we did mention something about balancing light temperatures. Well, generally, when lights are on in a room, they tend to give off yellow tones which are different from the blue tones which the sun gives.
So, Photoshop or Lightroom, ensure that you balance out these different light temperatures as much as you can to give your photos a professional look
To do this, you’d need the Adjustment Brush. Select a brush for the warmer light and adjust it towards blue until it looks neutral. One tip when using the adjustment brush is to increase brush size and strength as well as feathering. This way, your blending is softer (source).
Photography Tip # 114 — How To Use Sky Replacements
Especially if you’re shooting at twilight, sky replacements can be quite useful. But when it comes to sky replacements, people are different. Some agents would prefer to keep things simple, others would want a little more punch.
Whatever the case, as a photographer, avoid choosing any sky replacement that’s overtly dramatic. The rule “less is more,” is one to live by in this case because you want all the attention on the house. So, go with a sky replacement that’s clean and simple, maybe with a few clouds, but no more (source).
Photography Tip #115 — Use HDR Correctly
You might not necessarily shoot using HDR, but, you’d definitely have to play with some settings in post so your shot comes out clean and crisp. Because truth is, it’s only rare occasions that the presets available would fit what you’re going for.
But as with most things, there’s a right and wrong way to do HDR photography. For instance, darkening around the window frames or light fittings, poor shadowing, and so on. These are examples of bad HDR.
Ensure that you set out enough time for post processing so you can employ HDR correctly. Don’t be in a hurry (source).
Photography Tip #116 — Don’t Give In To GAS
GAS – Gear Acquisition Syndrome.
It’s your skills not your gear that get you the customers. So, as a rule of thumb, stick with the very basics,] as a beginner and only upgrade when your skill set calls for it.
Photography Tip #117 — Photoshop Should Not Be Your Crutch
We can say that a thousand times. If anything needs to be fixed, it’s best fixed during the shoot, not in post. Post processing is also tasking, save yourself some time. Now, if the client demands extra Photoshop work, then be sure to charge for that service (source).
Photography Tip #118 — Consider Elevating Your Exteriors

By giving your exterior images just a few extra feet, you can make the photo even more impressive. Here are a few ways to do that.
The first is not very professional, but hey, it works. Extend your tripod legs fully and set the timer on your camera to 20 seconds. Afterward, lift the tripod above your head, hold it there and take 5 quick shots.
Another way to go about this is to use a CamRanger and a painter’s pole. Secure the pole to the tripod using bungee cords, then compose the shot.
Just ensure that whatever you do, you don’t lift your camera too high. If you do, you show the roof and people want to see a house not the roof. If the photo looks like you’re looking down on the house, then that’s too high.
So, as a rule of thumb, don’t go higher than 2/3rds of the house. In house terms, keep it at the rain gutter or the windows of the second story (source).
Photography Tip #119 — Work With Smartphone Apps like Blue Hour, Google Streetview, and Wunderground
These apps can make your life much easier when planning your shoots.
For instance, with the Google Streetview, you’d be able to check out the house you’re working and adequately plan your exterior shots. You’d be able to see the roads around the house, the trees too, as well as where to park. By the way, you shouldn’t park in front of a house you’re about to shoot.
The Blue Hour app helps you discover the golden hour and blue hour of the day. This way, you can give your client an exact time by which they can expect. Always give 15 to 20 minutes before the exact time.
Then there’s Wunderground which is a weather app.
We’re pretty sure there are many other apps that can make your work much easier, just be on the lookout for them (source).
Architectural Photography Tips

Photography Tip #120 — Get To Really Know The Space
If you really want to capture a building such that its essence shines through, then you’re going to have to get to know the building a little better. So, you’ll scout the location, know where the sun’s travel path, where shadows lie, where lines converge, as well as access points.
You also want to find those unusual perspectives and unusual angles. Find out if you wan people included in your shot or not, if people are usually about that axis. Now, that’s physically. How about conceptually?
Get to know who built that building and if there was any intriguing story behind it. You might also want to find out how others have photographed it before now.
Piecing the information you get from these little findings together can help influence how you photograph the building at the end of the day. But hey, no one is going to kill you if you focus on geometry and structure alone if that’s what you want to do (source).
Photography Tip #121 — Watch The Lines
Like we talked about in real estate photography, you want to be extra careful with the lines of your architectural shots. Make sure that the lines are going where they are supposed to, precisely. So, verticals remain vertical and horizontals remain horizontal.
It might sound quite simple but, in practice, it isn’t that easy. For instance, tilting your camera could cause keystoning – an occurrence where parallel lines begin to converge. When this happens, it begins to look like your building is falling backwards.
Photographers who choose to work with a wide-angle lens will also find that they have to cope with a bit of distortion.
To solve the problem with keystoning, then you might want to stand at a small distance from the building in order to elevate the point of view. Or you could also use a tilt-shift lens but that’s quite the expensive venture.
For lens distortion, you’d have to fix that in post, unless, of course, you have tilt-shift lens money (source).
Photography Tip #122 — Shoot During The Golden And Blue Hours If Shooting Outdoors
The rule of the golden and blue hours are super important if you’re going to be taking exterior shots of the building. As you know, improper lighting can make or mar your efforts. You also know that the golden hours and the blue hours are times when you’re sure of excellent lighting.
Also, although this one doesn’t happen all the time, waiting for the blue hour at just the time the city lights come on can also be magical.
For those who prefer night photography, you can also wait till nightfall, that’s also beautiful too (source).
Photography Tip #123 — If Shooting Indoors, Get The Lights To Work For Your Shoot
Generally, interiors are more complicated to shoot than exteriors when it comes to lighting. Most times, you’re going to have to make whatever light is available there work for you, except you bring your lighting with you. Obviously, this isn’t the easiest thing to do but you can make it work.
So, if there are windows, ensure you shoot at earlier times of the day so you can make the most of the available natural light. If working with low-level lighting, then consider getting a tripod to provide some stabilization while making long-exposure shots.
Finally, if you’re not going to be shooting in RAW for whatever reason, be mindful of your white balance. With artificial lighting, it’s possible for us to perceive the colors of buildings and their elements differently (source).
Photography Tip #124 — HDR Is Your Friend As Long As You Don’t Overdo It
HDR is mostly used to correct exposure balance in images, especially when you couldn’t set up your own lighting. It’s easily overused, but it can be a real godsend if you know how to use it.
Usually, using HDR takes a bit of experience – you get better with it overtime. But, generally, beginners and those who can’t afford to set up their own lighting, HDR can help you bring some magic in post (source).
Photography Tip #125 — Look Out For Details And Patterns
This is why we often advise that you take some time to think through what you seek to achieve before beginning the shoot. You want to make your photo engaging. So, look out for patterns, and details, and how they interact with each other, especially with older buildings.
With some exploration, you’ll get some interesting facts that might help you tell a more intriguing story with your shot.
One technique you can use is to take the shot on a conceptual or macro level. It, truly, opens you up to a whole new world of possibilities (source).
Photography Tip #126 — Find Unique Angles To Shoot From
Even if a building has been photographed before, you can look out for unique angles with which to take your own photos to add a bit of you into it. So, you’d have to find your unique perspective. You’d most likely find this when walking through the building like we advised in the first tip
And finding your unique angle does not always have to be so complicated. Sometimes, all it takes is moving the camera a few inches upwards or downwards. Or it might be to simply look upwards.
If you’re taking exterior shots, you might just have to check all sides to the building from different distances – far and near. If you want to get even more creative, you can try shooting from a rooftop or a balcony. Remember to stay safe and ensure you’re not committing a trespass (source).
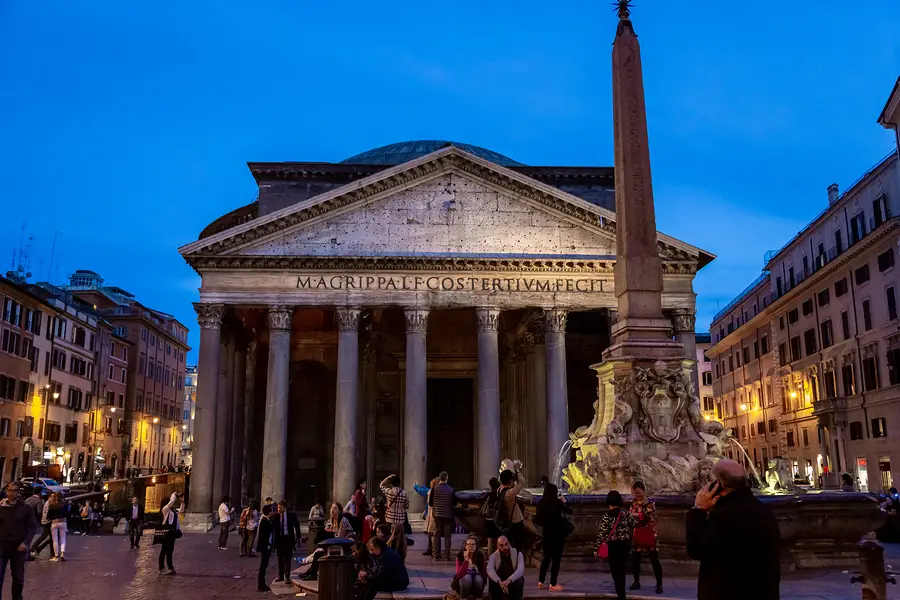
Photography Tip #127 — Add Context
But this tip is not for all kinds of architectural photography. For instance, if you’re seeking to achieve a geometrical or abstract image, context might not be necessary. Same goes for real estate photography.
However, if you want to tell a story, then you can add the context of the building into the image. It helps in that it guides the viewer to see the building in its original time and space.
With an exterior shot, you can do this by including cloud formation or weather. You can also do this by adding a bit of scenery around the building (source).
Photography Tip #128 — Throw In Some People
There would be no buildings without humans, so, there’s nothing wrong with including some of these elements into your photography. Interestingly, this technique largely underutilized in the world of architectural photography like people would contaminate the purity of the image.
But the truth is that seeing humans in a building also helps the viewer see the building from the human perspective of the building. And it’s easier for them to, after all, humans interact, chiefly, with other humans.
Besides that, in practical terms, adding humans to your photo can also give your image a sense of scale (source).
Photography Tip #129 — Take Time To Find Out Where All The Mirrors And Windows Are And What They Reflect
Now, reflections, depending on how they are captured, can either work in your favor or against it. If you capture them well, reflections can add a wow factor to your image that could make it more engaging.
But you need to be really careful because, if you’re not careful, you could capture your own reflection. To avoid that, therefore, know where all the mirrors and windows in the room are. Also, know what they reflect (source).
Photography Tip #130 — Invest In The Necessary Gear – Wide-Angle Lens, Filters
To take decent architectural shots, you’d need a DSLR camera (of course), a tripod, as well as a removable shutter cable. But that’s just basic stuff. To take things to the next level, you’d also need a wide-angle lens.
A wide-angle lens is important as it makes it easier to fit the entire width of the building’s frame in one shot. Please, don’t get a fish-eye lens. Fish-eye lenses are known to make distortion worse.
If you can afford it, you can also get some nice filters as well. This will come in handy especially if you take a lot of exterior shots. Graduated filters expose the foreground perfectly while leaving your sky bright and beautiful.
Other filters like ND filters (Natural Density Filters) and polarizing filters are good to get as well (source).
Photography Tip #131 — Learn Basic Post Processing
Even the most beautiful in-camera shots still need to be processed to some level, at least. So, the more you know about post processing, the more you can do with your image, naturally.
If you’re not yet fluent in photo editing software, then you might be overwhelmed by all the choice. However, this tip might help. Whatever you choose, make sure it’s one that would work with RAW images, even if you haven’t begun to shoot in RAW yet. Also, make sure it accepts lens corrections.
For those who might want to give HDR a try, remember that you’d need software that would help you merge your photos. Good examples are Lightroom and Photoshop. Photomatix and Aurora HDR are also good and are, in fact, specific to HDR images (source).
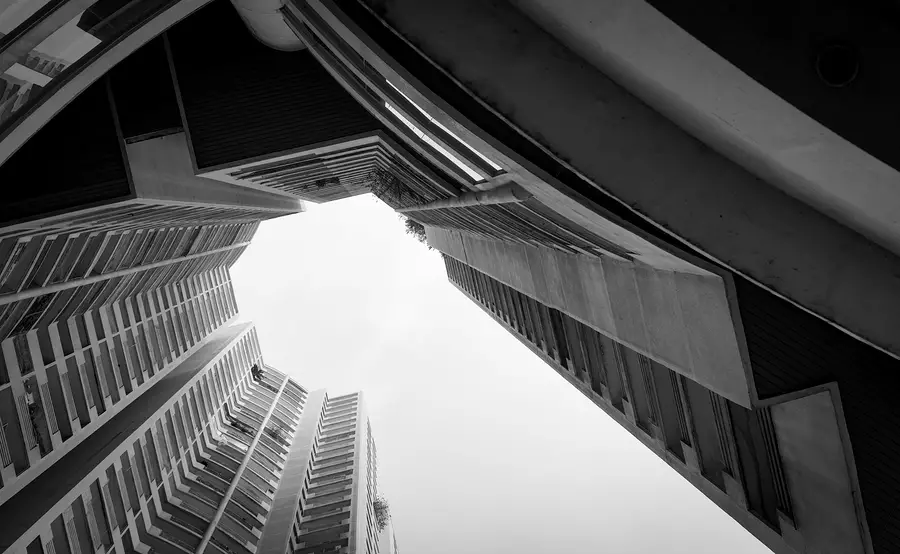
Photography Tip #132 — Try Shooting In Black And White
To nail this tip, look out for strong patterns and lines to add to the abstract effect you are looking to create. Also, look out for lines that draw the eyes of the viewer to one focal point.
The good thing about black and white is that you don’t need to worry about the sky and whether or not it is dull. But then again, there’s always the polarizing filter or red filter to help draw that contrast between light and dark areas (source).
Photography Tip #133 — Revisit The Building Many Times
For every other time you revisit a building, you unveil a new layer of the building that you might have missed the first time you went. Plus, you can also use this technique to tell a story of development in your chosen building, could also be degeneration. You know, while a newly completed building is awe-inspiring, real stories are told over time (source).
Food Photography

Photography Tip #134 — Use Natural Light
For food photography, you want to stick with natural daylight rather than artificial light. illuminating with artificial lighting usually casts an ugly yellow or orange color to the food which is bad for your photo. And with food, color is super important. You need the colors of the food accurate. So, white plates, white table cloth, white rice, all must remain white not orange.
The best kind of light you want to use for your food is natural daylight – soft and diffused. If the weather is warm, you could even try taking your shoot outdoors. If the sun is bright though, avoid shooting outdoors as harsh sunlight will cast unflattering shadows onto the food.
Overcast days, on the other hand, are perfect days to do a photoshoot of foods. On these days, the cloud naturally diffuse light. So, the natural light is soft with only subtle shadows.
If you’re shooting indoors, then let the light coming in from the windows serve as your light source. You should have a table close to the window to make setting up your composition easier for you (source).
Photography Tip #136 — Control The Shadows
Shadows have to be controlled as they could ruin a good picture if they are too dark. Shadows that are too dark are, typically, caused by strong sunlight. But, like we explained in the last tip, overcast days are not the same. The shadows are there but they are softer, and therefore, better for the shots by adding dimension and depth and subtly without necessarily dominating the entire scene.
If you’re shooting indoors and the light from the window is too bright, then you can use a white curtain that’s semi-transparent as a diffuser. If you can’t do that, try getting away from too close to the window or try another window.
If you’re shooting outdoors, then consider using a reflector as fill flash. Even a white sheet of paper will work too. The reflector should be on the same side as the shadow, but facing the sun so that light from the sun can bounce off it and on the subject (source).
Photography Tip #137 — Keep The Background Neutral

If your background is too cluttered, you can distract the viewer from the food, so always strive for neutrality. Now, neutral does not have to mean plain. You can add a few props that complement your subject, but nothing that suppresses it.
When it comes to backgrounds for food, there are three kinds that will never let you down – light, dark, and wooden/brown backgrounds.
Usually, dark foods go with darker background while light foods go with lighter backgrounds. Wooden/brown backgrounds can work well with nearly all kinds of food.
Table cloths and tea towels also work great as backgrounds especially when they are white. For certain foods though, other bright colors can also work. Vintage floral patterns too are not always a bad idea.
If you want to try out other kinds of backgrounds, you could try a carpet, a rug, a black chalkboard, baking paper, tiles, newspaper, or a baking tray. A neutral wall works too (source).
Photography Tip #138 — Play Around Colors
Food photography gives you that leeway, so make sure you milk it. Color can affect the composition of your shot as well as its overall feel.
So, similar colors give a feeling of tranquility while contrasting colors bring vibrancy and excitement. Red and green are two colors that contrast nicely in photography. You can use employ that either by contrasting the food with the background or contrasting the colors in the food itself (source).
Photography Tip #139 — The Angle Matters
You want to shoot from the angle that gives you the best view of the subject. Usually, that angle is from above, especially if the food is plated.
There are several reasons shooting from above works. First, you get all the details of the food as well as the background, cutlery, dishes, and other objects on the background.
Also, shooting from above is easier for the photographer composition wise. You get to arrange all the elements quite easily on the surface you’d be shooting on.
Lastly, when you shoot from above, you can, more easily, eliminate any distracting element in the background, a busy room/outdoor location.
There are exceptions, though. For foods with interesting layers like a cake or a glass of smoothie, you could shoot from the side instead. Other foods that would be great to be shot from a side angle include sliced bread, and muffins. When using the angle from the side, endeavor to keep the background neutral.
Another angle you can come from is a diagonal angle. This one makes your object look more 3-dimensional as you get both the top and side view.
What if you’re not sure? Take many pictures from different angles, you might be pliantly shocked at the results (source).
Photography Tip #140 — Ensure The Food Is Neatly Arranged
The arrangement of your food impacts the final result you get in your shot. So, ensure that the each element’s place in the scene is well thought-out, first. You want to create balance as well as hold the interest of your viewer, so keep it unique and creative.
With vegetables, it’s even more fun as you and cut them into similar shapes and patterns.
Now, remember that little oversights can ruin your photo. So, check for spillage either on the plate/bowl or on the background, after plating your food, especially with broths, sauces, and soups. You don’t want any unnecessary messiness in your photo (source).
Photography Tip #141 — Give Some Space Around The Subject
The subject should not dominate the entire frame. There should be some space around the subject (called empty negative space) to make your composition look more appealing. Close up shots are nice too but with some space, your viewer is better able to appreciate your subjects and their shapes.
Depending on the background you choose to work with, empty negative space can either make your scene look darker or brighter. Typically, if the background is dark, the scene appears darker and vice versa.
You can also play around where you place the subjects on the background, dead center or to the side? You could even take as many shots as you can, all the while placing the subject in different positions. You can, afterward, pick your best photos (source).
Photography Tip #142 — Add A Bit Of Décor
As much as you want to keep your background simple, there’s absolutely nothing wrong with decorating your scene with some small items. You could include sprinkles of your ingredients around the scene to spice up the composition. These could also serve as a visual recipe for the meal in the photo.
Berries, fruit, chocolate, fresh herbs, and nuts can serve as great decorative pieces. But, even inanimate objects can be great decorative pieces as well. You could try colored stones, cutlery, flowers (especially in the summer), leaves (especially in the fall), acorns, pine cones, chestnuts, and beautiful pebbles (source).
Photography Tip #143 — Tell A Story
Adding more elements to your food scene can help you tell a compelling story. Examples of elements you could include are an open book, a tea cup, a laptop, cookery books, etc. Each of these elements can tell unique stories when included in the composition (source).
Photography Tip #144 — Include A Human Element

This is another powerful way to tell a story. For instance, simply including a hand in the composition makes the viewer feel like you took the photo from their point of view. Other ideas are to have the hand holding a cutlery, this could evoke a sense of motion. You could also have the hands of more a group of friends to tell the story of friendship and delight (source).
Photography Tip #145 — Keep Things Simple
Even with all the tips we’ve shared, sometimes, it’s just best to keep things simple. Foods with bold shapes and colors would do just fine with a simple background. You could also place your subject dead center with little to no décor for an even stronger impact.
For the plates or cups containing the food, keep them simple so they don’t compete with the food for attention. Oftentimes, simple, white china is best.
If the shot is a close up one, though, then completely take out the décor (source).
Photography Tip #146 — Adjust Your Camera’s Exposure Level
Just before you take your shot, adjust the exposure level in your camera. Because food photography often contains white plates, the backgrounds can come out over-exposed. So, you want to make the adjustment before you take the shot (source).
Photography Tip #147 — Always Prepare A “Rough Draft”
Most times, you have a limited time to get your food photography right. For instance, with hot foods or frozen foods. Naturally, hot food looks better steamy and frozen foods are better frozen. So, already, you understand that you don’t have all the time in the world.
However, there’s nothing that says that the food’s first appearance must “the one.” A way to go about this is to have a rough draft of food. With that one, you can perfect your composition and light settings before you bring on the real food. Pros call the “rough draft food” “dummy food.”
Now, you must ensure that you do not change anything between the dummy food and the hero food. This is critical. You must ensure that everything is exactly the same when you get it right with the dummy food (source).
Photography Tip #148 — How To Shoot Ice Cream

Ice cream is one of the toughest things to photograph when doing food photography. But here’s a way to go about it for the best results.
Take out the ice cream you wish to photograph before time and put it on some dry ice. Make sure you take out more than you think you need.
When you’re ready for the shot, take the quantity you need and then blow out the vapor from the dry ice using a straw. Doing this will get the vapor out of your shot but won’t melt the ice cream. You can also try to melt certain parts of the ice cream to give it a fresh look using a straw (source).
Photography Tip #149 — Some Foods Are Just Ugly, Here’s How To Shoot Them

If a food isn’t cooperating on the plate, you could photograph the ingredients instead. Just be sure to make the photo of the ingredients fill the entire frame.
You could also take a shot of the work in progress, like while the food is being cooked. For instance, taking a shot of a rather sloppy dish while it’s being stirred or poured might make a more flattering photo than when the same dish is plated (source).
Photography Tip #150 — Know What The Photo Would Be Used For
If you know what the photo is going to be used for, you’d know exactly to crop and compose your photo to perfection. It’s important because the orientation and crop of your picture must work with the layout for it to be considered perfect. If it doesn’t, you risk reshooting or never getting rehired.
So, as a tip, take as many shots as possible, from as angles as possible so your client has options. Good tip – make one of the shots a cover whatever the case (source).
Photography Tip #151 — You Never Touch The Stylist’s Food
You both take your jobs seriously. So, the same way they won’t reach for your camera, please do not reach for their food. If you need to move something in the food, get them to do that themselves. Of course, you can move the plate, but never touch their food (source).