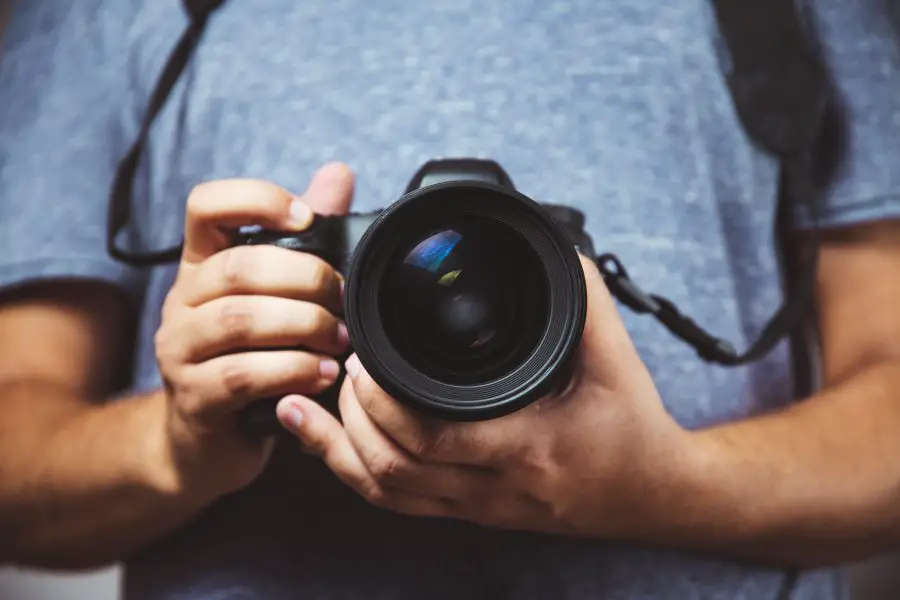
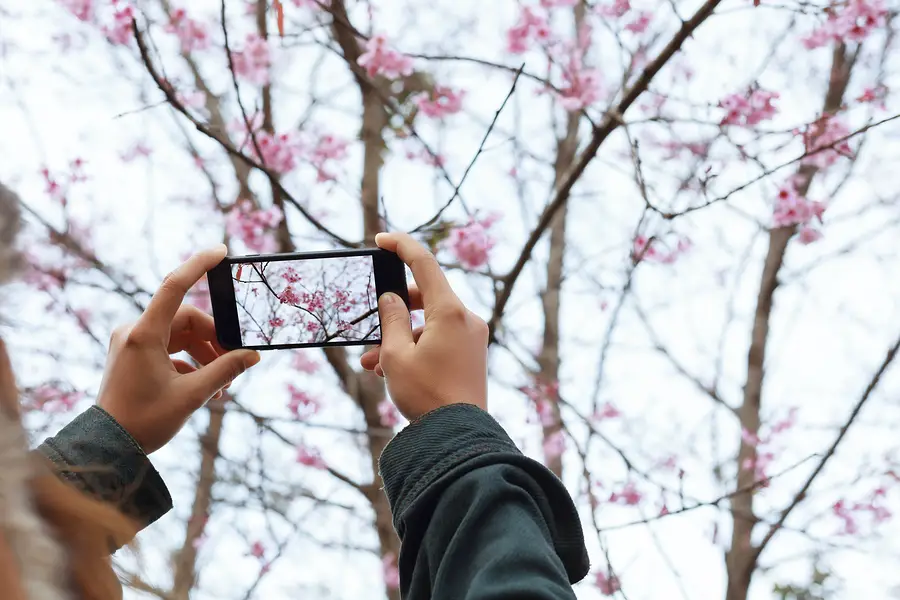
iPhone Photography Tips
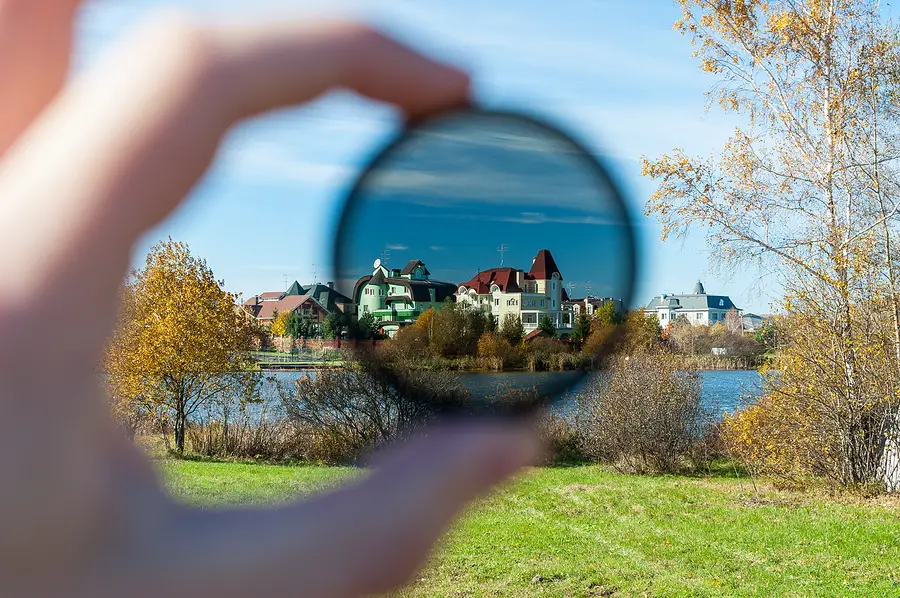
Photography Tip #43 — Simplicity Is Key
Too many details in one picture are distracting to the viewer and make it difficult to create an appealing composition. What you really need, most times, is one interesting subject alone. It’s always a lot easier to make a great composition when you have just one subject to work with.
Don’t be too bothered that there’s so much empty space in your photo. This is known as negative space and helps your subject stand out. In fact, knock out all distractions in your scene before you take the photo.
Also, a minimalist composition is much better when you’re sharing on Instagram. This is because simpler photos have better chances of standing out on a phone’s smaller screen than overtly complex ones (source).
Photography Tip #44 — Shoot At An Angle Lower Than Chest Level
When shooting with an iPhone, the easiest angle to shoot from is chest height. It is quite convenient which is why most people just shoot from there without thinking. However, there are more creative angles from which you can take photos using your iPhone.
One of the best angles you can shoot from is from a lower angle, and here are three reasons why:
First, photos taken from a lower angle are more intriguing as they show you the world from a fresh perspective.
Secondly, with a lower angle, the only background you’d be working with is the big blue sky. So, you have fewer distractions to deal with and your subject can truly stand out.
Third, when you shoot from a lower angle, you get to show off all the interesting details the foreground has to offer.
So, when next time you’re taking a landscape photo, consider shooting from a lower angle. This way, you could include the flowers or the water reflections in the foreground.
Don’t be shy to kneel or even lie down for the ultimate shot! (source).
Photography Tip #45 — Show Some Depth
A sense of depth always helps to make a better photo as it draws the eye of your viewer into your scene. You’d need this tip especially when doing landscapes.
One technique you can use to this is to use the power of leading lines while composing your scene for a photo. Let the line lead starting at the foreground and then into the distance. The line draws your viewer in and, thereby, creates a more engaging photo.
You can also do this by including other interesting things in the foreground like flowers, leaves, rocks, or other interesting things you might find. If this feels like a struggle, then try lowering your angle just a little bit.
The middleground and background shouldn’t be left behind too. Including subjects in the foreground, middleground and background will give your photo a more 3-dimensional look that you’d love.
Another way to create depth is to frame the scene using a subject in the foreground. Archways, overhanging branches, and window frames qualify as great framing objects.
When you shoot through a frame, attention is automatically drawn to the beyond through the frame which evokes a strong feeling of depth (source).
Photography Tip #46 — Get Closer
When photographing objects with intricacies, it is important to get closer to the subject so you can capture all the detail. Colors, textures, patterns, leaves, flowers, water droplets, all these come to life when you dare to inch closer to the object.
Another kind of photography that would benefit from this technique is portrait photography. In portraits, the emotions, and facial features of the subject are important details you want to capture in your subjects when taking portraits, whether it’s a person or a pet.
Now, when taking portraits with your iPhone, you want to remember that the native lens of your iPhone can’t exactly focus well if they are too close to the subject. To be able to focus well enough to get all the intricate detail, you’d need to get an additional macro lens.
There are many macro lenses you can get but two of the most popular options are the Moment and Olloclip macro lenses. You can check those out.
Landscape photos might be distant, but including a close up detail won’t hurt too. You can include that in the foreground to create some sense of depth (source).
Photography Tip #47 — Shoot Silhouettes

You know what a silhouette is – dark shape, bright light. They are always eye-catching and quite simple to take. So, how do you do that with your iPhone? Simple. Get something interesting to shoot, then shoot facing the light.
To make your results more stunning and dark, set the iPhone focus in your camera app. Then darken exposure by swiping down. If that’s not enough and you want to darken the silhouette further, you can do that edit the photo with any good editing app.
For the best silhouette shots, utilize the golden hour we talked about earlier. This will give you an amazing colored sky as background.
You can also take silhouette photos indoors as well by placing the subject either in front of a lamp or in front of a window (source).
Photography Tip #48 — Include Some Shadows In Your Compositions
You can include shadows to give your photos and intriguing or mysterious feel.
Shadows are attractive and interesting. They are also useful as they can function as leading lines as well. Again, just like silhouettes, shadows are best shot in the golden hour when the shadows are longest.
You can use the tip we shared with the silhouettes to darken the shadows.
So, look out for interesting patterns to make your photos more interesting. Whether you choose to photograph the subject and the shadow or the shadow alone, shadows are always a nice angle to work (source).
Photography Tip #49 — Reflections Are Nice Too
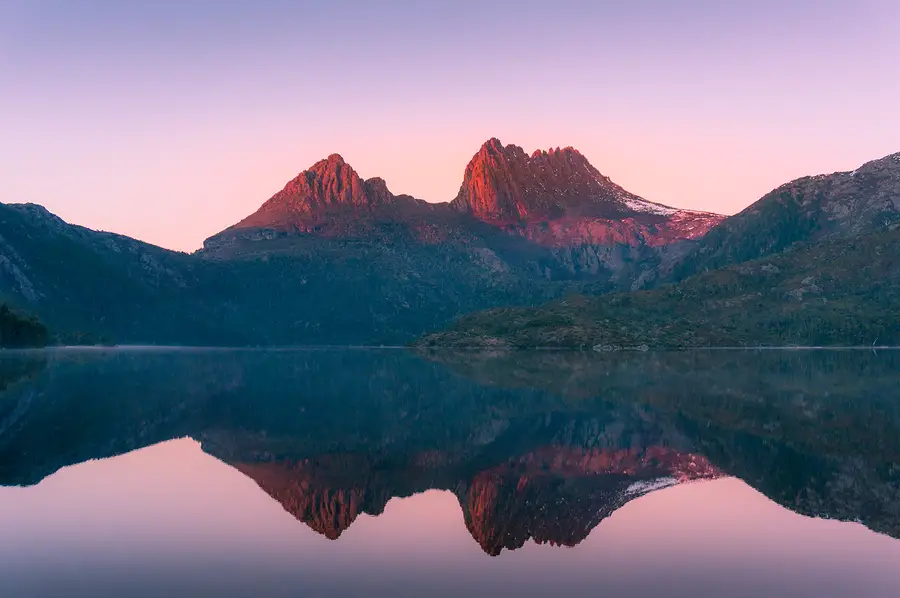
We’ve seen that reflections are nice elements to include in your photos and the same applies to iPhone photography
To add extra dimension to a water reflection, for instance, you can add ripples and waves to produce a distortion for a beautiful effect. You can also include the subject and its reflection for an even stronger impact.
Just pay attention and you’ll notice reflections wherever you go which you can include in your photos (source).
Photography Tip #50 — Work With Symmetry
Make it a point to find symmetrical images everywhere you find yourself, they make for really striking images. Then when composing your shot, make it such that the two halves of the picture are almost identical, at least.
You can also create symmetry with reflections by simply by creating a line of symmetry dead center. Architectural pieces are naturally symmetrical as well.
Now, we know that, according to the rule of thirds, it’s advised to move your subject off center. But, once in a while, it’s okay to set your subject in the center to create some semblance of symmetry (source).
Photography Tip #51 — Try Diagonal Balance
To create some form of harmony and balance in your photos, you can try for diagonal balance. This works really nicely when there are two or more than two subjects in your scene. It makes it easier for your viewers to flow with your scene. On the other hand, keeping everything on one side would make your image appear a bit unbalanced.
But what do you do if the objects in your scene are unmovable? Like when you’re taking a landscape photo, for instance. Remember the “move your feet” rule, yes. Here is the time to apply it. Move around until you can find an angle where the objects in the scene appear in a diagonal alignment.
You can also use the tip on leading lines to create that diagonal alignment as well.
Like with reflections and symmetrical images, you want to be on the lookout for subjects in diagonal alignments. The more you can identify them, the more you’d be able to (source).
Photography Tip #52 — Use VSCO Filters When You Edit
For more stunning photos, you’d have to step up your editing game using VSCO filters. These filters are beautiful yet understated. Even though they aren’t exactly beginner level editing, they are not quite as complex as more advanced software like Photoshop. So, they are, generally, easy to use.
Now, the subtleness of the VSCO filters could be the undoing of many photographers because it’s quite easy to overdo it. So, you want to be careful.
Other than that, the VSCO app comes with loads of free preset filters and you can even download it for free. If you want to go hardcore, though, there are more sophisticated tools on the app which you can use (source).
Photography Tip #53 — Hold Your iPhone Like A Camera
When taking your photos with your iPhone, learn to hold it like a camera not just like a phone that has a camera. So, the screen is your viewfinder and you look into your viewfinder not past the phone to take a photo (source).
Photography Tip #54 — Zoom In With Your Feet Not The Camera
Don’t ever zoom in by dialing in the zoom function. If you want to get closer, move your feet. Even a little bit of zooming when shooting with an iPhone often results in a pixelated and grainy image. So, you want to avoid that (source).
Photography Tip #55 — Check Your Settings – Set Them On High
This one is quite straight to the point, right?
Photography Tip #56 — Clean Your Lenses
Your phone is everywhere from your bag to your back pocket. So, it’s inevitable that the lens would get dirty at some point. Ensure that you clean it often.
Landscape Photography Tips
Photography Tip #57 — Make Plans Beyond Checking The Weather
Sure, you’d have to check the weather but for the best landscape photos, you have to make your plans like a pro. Here are some other things to check that would help you prepare like an experienced photographer.
You could look out for the tum sun sets or rises in the location you have picked out. You also want to find out what direction exactly the sun faces when it rises or falls to help you make a desirable shooting position.
This might seem like a lot, especially for a noob but we can thank heavens for technology. These days, there are apps that do literally everything. One of the most useful ones is the The Photographer’s Ephemeris.
This app works with Google Maps and can give you nearly all the information you’d possibly need while planning for your landscape shoot. To use the smartphone app, you’d have to pay a small subscription fee but trust us when we say that it’s totally worth it (source).
Photography Tip #58 — Use Wide-Angle Lenses
In truth, you should let the subject and location determine the technique as well as the focal length you use for each shoot. However, from experience, you begin to find that every landscape photographer would benefit from including ultra-wide-angle lenses to their kit bag.
So, if you’re using an APS-C, consider a 10-20mm focal range. If full-frame, you’ll be able to take really stunning photos with a wide field of view using lenses with a focal range of about 15-30mm (source).
Photography Tip #59 — Travel Light To The Degree That You Conveniently Can
You’re probably going to have walk a ways to get to the precise spot in your location where you want to take your photos. So, it’s just common sense to travel light. Pack what you need alone. Don’t pack 4 lenses if you need 3, these things add up.
But then again, you don’t want to forget the essentials. Some of these essentials like spare batteries, filters, lens-cleaning materials, as well as weather-appropriate clothing could make all the difference. Don’t leave home without them (source).
Photography Tip #60 — Set Up Properly
When it comes to landscapes, camera settings are hardly ever complicated.
Usually, you’d shoot in aperture priority mode. This gives you a good level of control over the depth of field of your photo while allowing the camera select the right shutter speed.
So, you want to set your aperture to f/16 to create that large depth of filed and then set the ISO to 100 so image quality is sharp.
Metering mode should be at Evaluative/Matrix so that the camera reads light from every area of the scene. This will help the camera to calculate and give the image the right exposure. But if that doesn’t work for you, you can always darken or lighten the exposure by using exposure compensation.
Now, all these settings plus filters in front of your lens have can add up to slow down shutter speed. So, if you find that your shutter speed drops to below 1/25th of a second, you might want to use a tripod. Do this while using a remote to trigger the shutter rather than using your fingers. You’re doing this to avoid camera shake which could lead to blurry photos (source).
Photography Tip #61 — Ensure That Your Photos Are Sharp
To ensure that your image is sharp and depth of field looks good there are two important things you must nail – correct focusing, as well as using a narrow aperture. But note that right focusing technique is even more important as even with an aperture as narrow as f/16, you could focus wrongly and then the background and foreground could be out of focus.
So, how do you focus correctly for landscape photography?
Well, the best way is to work with manual focus, both for the lens and the camera. Next, you want to rotate the focusing ring on the lens so it faces the appropriate aspect of the frame. That aspect would be the position on-scene that’s about a third of the distance facing the horizon.
After identifying this point, you can use your Live View or your viewfinder to view as you rotate the lens focus ring slowly. Once you’ve gotten a sharp image at the right spot, it’s time to steal that shot.
After doing this, zoom into your image on the screen to be sure that it’s sharp all the way – i.e. from the front to the back. So, if you find that your foreground is sharp but the background isn’t, you’d need to take another shot, setting your focus further backwards.
Keep repeating this process until you’ve finally nailed the overall sharpness all over the scene – from front to back (source).
Photography Tip #62 — Use Polarizing Filters
These help you produce sharp photos, with beautiful contrast
(source).
Photography Tip #63 — Use ND Filters
ND filters (Natural-Density filters) help to reduce the amount of light streaming into the lens. This means that when using ND filters, you’d be able to use slower shutter speeds than you normally would. With this, you can creatively blur out clouds and water when you want for a beautiful effect.
ND filters are at different light-blocking densities. From 1-stop to 10-stop, even to 15-stop (source).
Photography Tip #64 — Don’t Forget The Details In The Skies
For this, you’d need ND grads (Natural-Density graduated filters). These filters work pretty much like regular ND filters, but here’s the difference.
Beginning at the top, these filters regulate the amount of light streaming into the top of the frame. But as they begin to graduate to the bottom, the filtering function gradually reduces till there’s no effect. So, essentially, the top is filtered while the bottom is unaffected.
These filters, thereby, help you achieve tricky task of capturing the beautifully exposed bright sky with a perfect dark foreground in one shot (source).
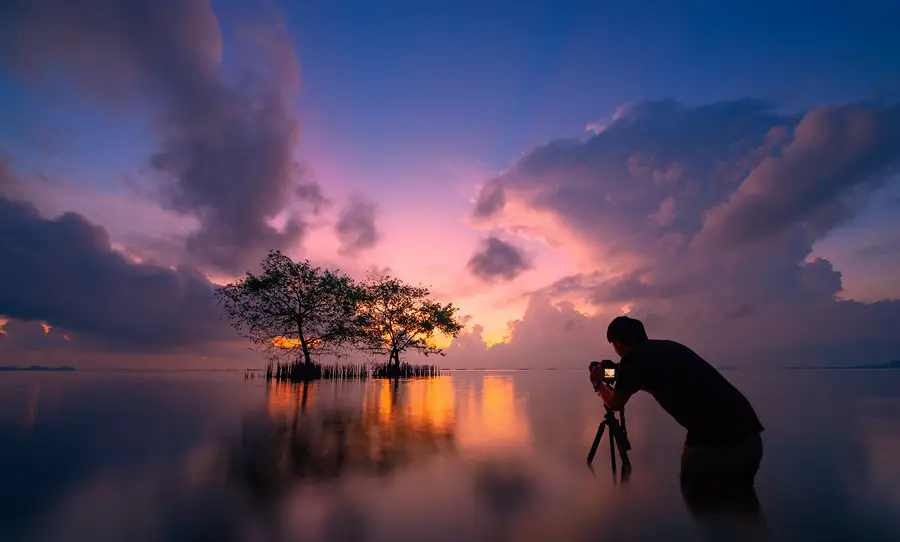
Photography Tip #65 — The Blue Hour Rule

We’ve talked about the golden hour rule but have you heard of the blue hour rule? The blue hour occurs just after the sun has set, twilight if you may, and it brings with it many beautiful opportunities for a great shot.
While called the “blue hour,” the blue hour is more like a time period (not necessarily an hour) where the light wavelengths reaching the earth are predominantly violet or blue. Naturally, the sky might still retain a bit of oranges and reds here and there. However, the ground is mostly bathed in a soft blue hue. The results are amazing, trust us (source).
Photography Tip #66 — Don’t Be Afraid Of A Little Drama
Just because an overcast day isn’t as colorful as the sunrise or set doesn’t mean it has to be a total day. So long as there are details in the clouds and the skies aren’t all grey, overcast weather is perfect for a moody image. Add that to the probability that the sun might just shine through for a second there and you find that overcast days aren’t so bad (source).
Photography Tip #67 — Strive For Visual Balance
Composition is another crucial aspect of landscape photography that can make or mar your photo.
The most important rule you need to master for this one is the rule of thirds. We already explained that, and so we won’t be going over it again.
There are cameras that come with a rule-of-thirds grid right on the viewfinder or screen (if you’re shooting using Live View). So, if imagining the grids is difficult, this might be a big help for you.
To enable this setting on your viewfinder, you can peruse the menu for custom functions on your camera. If you’re working with Live View, on the other hand, toggling the display button might give you access to the function (source).
Photography Tip #68 –Utilize the Power Of Foreground Interest
This is another compositional device which can work together with the rule of thirds to bring a sense of harmony between the foreground and background of your photo. You can position anything at all that’s related to your scene at the “entrance” of your image as a sort of stepping stone for your viewer’s eyes.
Please, in a bid to utilize this device, don’t just include random stuff in the foreground that have no relationship with your scene. You want the objects in your scene to have some relevance to the scene (source).
Photography Tip #69 — Use Lead-In Lines

Lead-in Lines help to draw the eyes of your viewer into your image, and that’s what makes them fantastic composition devices.
To do this, you’d need to work with a linear element in your scene, a strong one, that is. This strong, linear element could be rocks, a wall, a road, or even a bridge.
So, you want to position this element such that it falls in the bottom third of the frame. In fact, let it begin smack bottom and then let them lead into the focal point of the image.
In some cases, these lead-in lines can also double as your foreground interest as well (source).
Photography Tip #70 — Rules Are Made To Be Broken
It’s good to know the rules as they are made for a reason. But once you’ve mastered them, please feel free to break them where necessary (source).
Photography Tip #71 — Less Is More
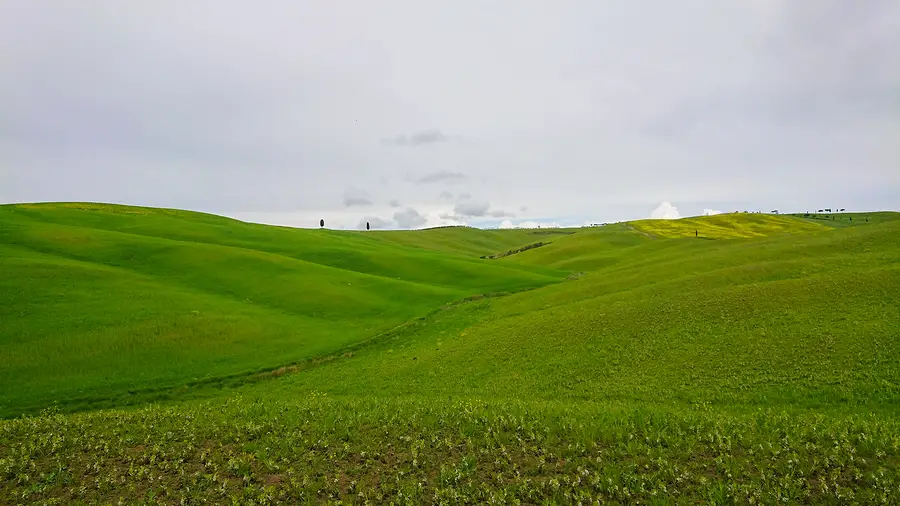
A minimal landscape can tell a story equally as compelling as one with all the light and detail. Now, at this point, we will be sharing another compositional device known as the rule of threes. According to that rule, in a composition, three objects are more appealing to the eyes than four objects or two.
So, next time you’re aiming for a minimalist landscape, if you can’t get a lone tree, get three (source).
Photography Tip # 72 — Creatively Move Your Camera
When it comes to landscapes, we have talked about the importance of keeping your images sharp. Blurs should only be used for moving elements like water or similar.
Now, if you want the whole landscape to be a blur, that is also achievable, but that would mean you doing things entirely different from the way you know it.
But before we get to the techniques for shooting such dynamically blurry landscapes, your settings. First, your camera should be in shutter priority mode at 1/8th of a second. Secondly, ISO should be at 100.
The first technique with which to achieve the desired blurry landscape is panning. It’s great for trees. And a horizontal panning technique would be great for coastal shots.
Another technique you can use to achieve this method is the zoom burst. With this technique you zoom into your subject with your lens and focus. After that, you zoom out slowly, releasing the shutter simultaneously.
For better results, you can also try experimenting with different shutter speeds (source).
Photography Tip #73 — Create Starbursts
Shooting at sunrise or sunset is beautiful. However, because the sun is usually quite bright at such times, shooting might be difficult although the light is soft.
To solve this, you can create a starburst. You do this by positioning yourself such that the sun is partially obscured by an object in the scene. Another way is to shoot at that point when the sun is peeking over the horizon.
Now, you want to do all this with your aperture set at f/16 or f/22 so the bright light from the sun is captured as a beautiful star. With this, you won’t even need a filter to make your photo look stunning (source).
Photography Tip # 74 — Create Mirror-Perfect Symmetry Using Reflections
We’ve explained this tip already so we might not go over it again. But since we are here, reflections are a fantastic way to create mirror-perfect symmetry. For this kind of shot, you want to position the horizon line such that it runs across the center of your frame in such a way as to divide the reflection and the scene into two equal halves. The far bank of the lake can also do the same function as the horizon line (source).
Photography Tip #75 — Shoot On A Misty Morning Too

Mist gives your landscape a mysterious feel that you shouldn’t miss. The best kind of mist you want to aim for is the radiation fog. This one forms during nights that are still and clear, that is when the ground gives off the heat accumulated during the day in form of radiation, hence the name.
Now, when radiation fog forms, it will, typically, stay close to ground level in a thin, white layer. So, you might need to use in-camera exposure compensation to make up for under exposure.
Also, for more compelling results, try facing the sun (source).
Photography Tip #76 — Experiment With Abstract Details
Even if the weather in your desired location is not ideal, you could still strike landscape gold if you persevere just a little. For instance, you can find details to interest you in reflections in pools, patterns in rocks, etc.
With a telephoto or kit lens, you can zoom in to the detail of interest and leave out the surrounding scenery.
Experimenting with filters could also keep things interesting as well.
We’ve talked about the polarizers which reduces saturate colors as well as glare. Then there are also ND filters which allow shooting at slower shutter speeds. So, who knows? You could even blur water for a dramatic abstract effect (source).
Photography Tip #77 — Find Different Viewpoints
Always makes sure to explore the location for the best viewpoints before setting up your camera to shoot. And if you eventually have to lie on the ground to get the perfect shot, don’t overthink it, just do it! (source).
Photography Tip #78 — Your Photo Should Have A Focal Point
Every shot, especially landscapes, need a focal point. It gives the eyes a place to rest and, without it, your viewer can move on from your photo rather quickly.
For your landscape photo, your focal point can be anything from a boulder to a rock, a tree, or even a silhouette.
But it also matters where you place this focal point of yours, so don’t forget to apply the rule of thirds here (source).
Photography Tip #79 — It’s Okay To Capture Motion Too
The term “landscape photography” often provokes the thought of a serene, passive environment. But landscapes are rarely ever completely still. Including some of the movement in your scene could make your image more interesting, so, consider it.
Look out for the birds flying, clouds moving, trees bending in the breeze, and the waves on the beach.
To capture such motions, you’d generally have to work with a longer shutter speed, which means that more light gets to your sensor. For this reason, you’d have to reduce aperture width a little bit. Or you could work with a filter or shoot either at the beginning or towards the day’s end when you don’t have to work with so much light (source).
Photography Tip 80 — Think Horizons
Before shooting landscapes, an old advice is to always think about the horizon on two different fronts.
The first is whether the horizons are straight. It’s true that images can be straightened in post. However, it’s always far easier and much better for the images to be straight right from the camera.
Next, think about where the horizons are compositionally. Naturally, this should be on one of the third grids in your image. It could either be on the top third or it could be on the bottom third, but never in the middle.
Of course, rules can be broken but, generally, that’s one rule to live by (source).
Portrait Photography Tips

Photography Tip #81 — Use The Right Lens
There are different kinds of focal lengths which work great for portraits. So, you’re going to have to choose based on what you seek to achieve.
For environmental portraiture, that is, you want to include some scenery, go for 35mm lenses.
At mid-range, good options are either 50mm or 85mm lenses.
For up close and personal shots, you should be aiming for either a 135mm prime, or you could also go for a 70-200mm zoom.
Let’s talk about zoom and prime lenses for a bit. They are fantastic options when it comes to portraiture, however, they each come with their unique pros and cons.
With zoom lenses, you get a lot of framing flexibility. So, they are the option to go for if the subject in question won’t sit still, like a per or a kid.
On the other hand, there are the prime lenses which are known for their sharpness and incredible bokeh. So, they are better options for subjects that move around as much (source).
Photography Tip #82 — You Don’t Always Have To Focus On The Subject In Its Entirety
There’s a reason the eyes are called the window to the soul. In a portrait, you don’t always need to focus on the subject entirely. Just zeroing in on the eyes can draw your viewer in and engage them the way you want. So, no matter how much of your subject you want to be in focus, always ensure the eyes are the cynosure of all eyes (pun slightly intended) (source).
Photography Tip #83 — Be Mindful Of The Light
Light is important as we’ve stressed earlier but we won’t go back to things we’ve discussed earlier. However, here’s another tip for portraitures. If you’re shooting during midday, then you want to ensure that your subject is either in the shade or in a position that’s away from the sun (source).
Photography Tip #84 — The Right Aperture To Use For Portraitures
To make your subject pop against a less-emphasized background, you should use wider apertures. Think f/2.8 – a common choice for most portrait photographers.
Now, it might be tempting to keep widening the aperture to make your subject pop even more. However, you want to keep in mind that wider apertures mean that less and less of your subject remains in focus.
If you want to show some more detail in your background, on the other hand, then narrower apertures are the way to go (source).
Photography Tip #85 Crop With Care
Yes, crop with care so your portraits don’t end up feeling unnatural. For instance, you don’t want to at the end like at the wrist or the ankles. If you must crop the limbs, then make sure you move higher up before you chop.
You also want to make sure that you don’t crop off all the space above the subject’s head (source).
Photography Tip #86 — Get On The Same Level With Your Subject
This rule is especially important when the subject is a little child or a pet. Get down until you’re eye-to-eye with them to give your photos a more natural feel. Plus, doing that also makes the angle you’re working more flattering (source).
Photography Tip #87 — Natural Sunlight Is Your Best Friend

You should always know what your light sources are when taking portraits. If you’re a beginner, your easiest light source to work with would be the natural sunlight.
So, if you’re shooting indoors, you might want to place the subject close to the window to catch some of that sunlight (source).
Photography Tip #88 — Try Fill Flash
This helps you fill in on those strong shadows which could, otherwise, mess up your photos. It’s a technique that’s particularly important when shooting outdoors. Yeah, who knew, right? Flash is useful outdoors too.
Photography Tip #89 — Use Reflectors
A flash is not the only light-modifying device that there is. There are also such things as reflectors. You must have seen them before. Large and shiny, these disks bounce light (ambient light) to the subject.
Reflectors become even more helpful when shooting outdoors in the bright light. The ambient light bouncing from them brighten the shadows on the face of the subject, making for a more balanced exposure (source).
Photography Tip #90 — Shoot in RAW
Goes without saying, right? More room to edit. We explained this in the third tip for beginners. You can look up the full explanation there.
Photography Tip #91 — Authentic Expressions From Your Subject Are Gold!
Get your subject to be comfortable around you so their natural facial expressions shine through when taking their photo. So, connect with your subject, know them, chat a little bit, and get them to feel at home while shooting.
You want to know within yourself how exactly you want them to smile too. Do you want a cheesy grin or a more subtle one? As you do the shoot, you want to direct your subject to that feeling that brings out that smile (source).
Photography Tip #92 — Direct The Model
Give your subject things to do other than simply standing and staring into the camera. That could come off awkward except that’s the point. You can have them smile at something outside the frame, walk towards you, play with something, etc. it might help to come prepared with a list of things you want them to do during the shoot.
Also, there’s nothing wrong with getting some inspiration from your favorite photographers on Pinterest or Instagram (source).
Photography Tip #93 — Look Out For Angles That Flatter Your Images The Most
Especially for full body shots, you want to try to play with as many angles as possible to find the ones that are most flattering. Some good ideas are a 45-degree turn, or popping a hip. They don’t just flatter the image, they can also change how your subject looks as well. Let’s explain.
Generally, if an object is directly in front of the frame, it will always look larger than one that is pushed backwards in the frame. And you can use this information to help your subject too.
So, say the subject is a little conscious of their hip size, having them push their bum backwards can make the hips look slimmer (source).
Photography Tip #94 — Play Around With Style
Be free to allow your subjects play and interact with one another on set while you shoot. Not every shoot must be formal.
Kids should be kids and play. Couples should be left to interact with each other. Families, friends should have a good laugh and just enjoy some camaraderie. While all that is going on, snap away and you’d come up with photos that are far more natural and engaging than stiff photos.
Now, left to themselves, because they are in front of a camera, subjects might not be able to create such atmospheres themselves and you might find out that the interaction seems a little forced. You can help by asking them questions that get them talking. Ask about funny memories or something they look forward to.
Also, it might help to let your subjects know ahead of time that interacting on set might feel awkward at first. However, in the end, it always turns out fantastic in photos (source).
Photography Tip #95 — Add Some Props
Props make a photo more interesting and could also give the model something to do with their hands. Whether a hat to tip or a blanket to snuggle into, props make photos feel more dynamic and could help your subject feel less awkward (source).
Photography Tip #96 — Ensure That Your Subjects Are Kept Comfortable
Your subject’s welfare should be your concern when shooting them. It’s safe to say that an unhappy model would make for an agonizing shoot. So, make plans for breaks, bring some snacks along, just make it fun for everyone on set. Shooting can be quite exhausting as you know (source).
Photography Tip #97 — When You Should Use Exposure Compensation
Every camera has its metering system which is very important when taking photos. This system does the calculations and measures the right amount of light needed by the camera for the perfectly exposed shot.
Now, while this system is quite clever, sometimes it falls short. This is because it takes average reading, or what you’d call a midtone, somewhere between black and white. Fortunately, this reading is right most times, but other times, especially when there are extremely bright and extremely dark areas, this system can struggle a little bit. You’ll see this a lot at weddings where there are lots of white.
You can quickly correct this using your in-camera exposure compensation. Start by dialing up to +1 positive exposure compensation to lighten up the faces in the photo. If you review and the faces still need to be lightened a little, you can increase from +1 stop (source).
Photography Tip #98 — How To Set Your Shutter Speed
Before you set your shutter speed, consider the focal length of your lens else, you’d end up with camera shake. So, generally, you set your shutter speed to be higher than your focal length. So, if you’re working at 200mm, then you’d need to use a shutter speed of, at least, 1/250th of a second.
If you’re using a wide-angle lens though (18mm focal length, for instance), you can get away with a much slower shutter speed like 1/20th of a second, for instance.
Whatever the case though, ensure that your camera has a built-in image stabilization system or you have some IS lenses with you. These will help you shoot sharp images at slow shutter speeds even with your camera handheld (source).
Photography Tip #99 — Increase ISO
A lot of motion goes on while a subject is being photographed and you don’t want to catch your model at a bad time (half-blinking, gurning rather than smiling, etc.).
If you want to avoid all of that, then you should be thinking of using faster shutter speeds. With faster shutter speeds, you avoid camera shake and your images come out sharp. Now, this tip is particularly important because, more often than not, you’d be shooting portraits handheld.
So, stay in Aperture Priority mode with a wide aperture as we have discussed before now. If outdoors, or in good light, you can set ISO anywhere between 100 and 400 stops. In low light though, you can bump ISO up to 1600, 3200 or 6400 stops. Definitely better to suffer a little grain than end up with a useless, blurry photo (source).
Photography Tip #100 — Making A Choice of Lenses
The lens you choose to go with will definitely affect how your portraits come out. Wide-angle lenses are a must if you want to take portraits with visual impact.
Now, there are a number of techniques to work with a wide-angle lens for an amazing shot. Shooting from the ground up is one – it makes the subject appear taller. Just be careful not to get too close to the model when doing this, else you’d observe some distortion.
Another technique you could try is to tilt the camera just a little to an angle to give the shot a little more drama.
Now, what if the lens is a medium telephoto like an 85mm or a 105mm? In this case, the subject remains the focus of the shot, however, the background still plays a role and, therefore, you must be mindful of it.
To reduce the distraction from the background, your best bet would be to go with telephoto lenses such as the 70-200mm f/2.8 for a stunning portrait. This lens lets you zoom into your subject for a closer focus and less background or foreground distractions (source).
Photography Tip #101 — How To Focus Your Camera
If you’re using a wide aperture (e.g. f/2.8), it automatically increases the depth of field of the shot. So, you must nail your focus to the tee, else you end up with many of the facial features of the model out of focus.
So, if the composition is a tight one, keep the focus on the eyes. If wider, then keep the focus on the subject’s head. To make a sharp focus more easily achievable, then you might want to select a single autofocus point.
One way you can do this is to set the central autofocus point. Then press down on the shutter release button but only halfway, such that it focuses on the eyes or the head as the case may be. After this, recompose the shot so that your subject is positioned off to the side and then fully press on the shutter release button.
This technique we have described is usually much faster than having to work around autofocus points.
As a second option, you can set the autofocus points at the top corners of the frame and place them over the eyes of your subject before taking your shot.
Whichever technique you use, you’re sure to have your subject nicely positioned off-center to create a better balanced composition (source).
Photography Tip #102 — Have A Dedicated Flashgun
Also known as a speedlite or a speedlight, a dedicated flash is a more powerful flash than the one built into your camera. So, typically, it produces a larger burst of light than a built-in flash. This gives you the freedom to work with even narrower apertures, capture a larger depth of field, and light up the group of models you’re working with
Flashguns are also better because they give you better control, talking about the settings. Plus, you are at liberty to angle them sideways to get light to bounce off walls or ceilings(source).
Photography Tip #103 — Use Your Flash Lighting Creatively
With a flashgun, sizable diffuser, and remote triggers, there’s a vast array of cool tricks now up your sleeves for lighting your scene.
You can light the subject from the side, underexpose the background or the sky, etc. just get creative (source).